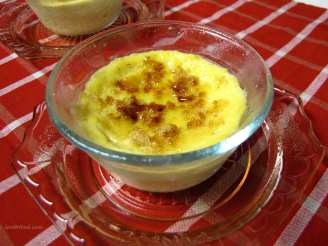
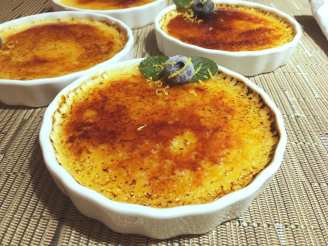
Orange Crème Brûlée

"From Fine Cooking Website"


- Ready In:
- 1hr 15mins
- Ingredients:
- 9
- Serves:
-
2
ingredients
- 3⁄4 cup heavy cream
- 2 tablespoons heavy cream
- 1 1⁄2 teaspoons Grand Marnier or 1 1/2 teaspoons triple sec
- 1 teaspoon orange zest, firmly packed and finely grated
- 1⁄4 teaspoon vanilla extract
- 2 large egg yolks (ideally cool or cold)
- 2 tablespoons granulated sugar
- 1 -2 teaspoon granulated sugar
- 1 pinch kosher salt
directions
- Position a rack in the center of the oven and heat the oven to 300°F Fill a teakettle with water and bring to a boil. Put two 5- or 6-oz. ramekins (about 3 inches in diameter and 1-3/4 inches deep) in a square baking dish that's at least as deep as the ramekins.
- Mix the custard base:.
- Pour the cream into a small saucepan and bring just to a simmer over medium heat. Remove the pan from the heat, add the Grand Marnier, orange zest and vanilla extract, cover, and let sit for about 10 minutes.
- Meanwhile, in a medium mixing bowl lightly whisk the egg yolks, 2 Tbs. of the sugar, and a pinch of salt just to combine. Set aside.
- With an instant-read or a candy thermometer, check the temperature of the cream; it should be no higher than 165°F (If it is, let cool to 165°F before proceeding.).
- Lightly whisk about 1/4 cup of the cream into the yolk mixture and stir for about 30 seconds; this tempers the yolks. Then gently whisk in the remaining cream, stirring for about 15 seconds to blend. Use a light hand--you don't want to make the mixture frothy or the baked custards will have a foamy-looking surface.
- Set a fine sieve over a large Pyrex measuring cup or a heatproof bowl with a spout. Pour the custard base through the sieve to strain out any solids.
- Bake the custards:.
- Divide the custard base evenly among the two ramekins in the baking pan. There should be a little more than an inch of custard in each ramekin; it should not come all the way to the rim. Slowly pour hot water from the teakettle into the baking pan (don't get any water in the ramekins) until the water comes about two-thirds of the way up the sides of the ramekins.
- Carefully transfer the baking pan to the center of the oven, taking care not to slosh hot water onto yourself or into the ramekins. Lay a s heet of aluminum foil over the pan. Bake the custards until the edges are set about 1/3 inch in from the sides of the ramekins and the center is slightly jiggly (like Jell-O), 40 to 55 minutes. To test for doneness, reach into the oven with tongs and give one of the ramekins a gentle shake or nudge. If the custard responds with a wavelike motion rather than a slight jiggle, it's not firm enough; bake for another 5 minutes and check again. (If you're not sure about the doneness, stick an instant-read thermometer into the center of a custard-don't worry about making a hole; you'll cover it with sugar later-it should register 150° to 155°F.) The custards should not brown or rise.
- Carefully remove the baking pan from the oven and take the ramekins out of the water bath using rubber-band-wrapped tongs or a slotted spatula. Let the ramekins cool on a rack at room temperature for 30 minutes and then transfer, uncovered, to the refrigerator to cool completely. Once the custards are refrigerator-cold, wrap each ramekin with plastic wrap. Refrigerate for at least 3 hours or up to 2 days before proceeding.
-
Caramelize the topping:
- Just before serving, remove the ramekins from the fridge and set them on a work surface. Working with one custard at a time, sprinkle 1/2 to 1 teaspoons of the remaining sugar over each one-the more sugar, the thicker the crust. You may need to tilt and tap the ramekin to even out the layer of sugar. Wipe any sugar off the rim of the ramekin. Hold the torch flame 2 to 3 inches from the top of the custard and slowly glide it back and forth over the surface until the sugar melts and turns a deep golden brown. Allow the sugar to cool and harden for a few minutes, and then serve immediately, before the sugar softens and gets sticky.
Questions & Replies

Got a question?
Share it with the community!
Reviews
Have any thoughts about this recipe?
Share it with the community!
RECIPE SUBMITTED BY

<p><img src=/<a href= alt= />http://i23.photobucket.com/albums/b399/susied214/permanent%20collection/adoptedspring08.jpg border=0 alt=Photobucket /></p>