3 Layer Chocolate Cake With Chocolate Mousse Filling (Gluten Fre

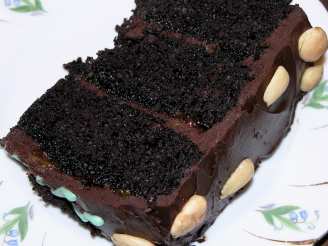
"This is a modification to Gluten Free Chocolate Cake (http://www.food.com/recipe/gluten-free-chocolate-cake-224448) previously posted. I added a layer to make it big, adjusted ingredients to be more allergy friendly and made a chocolate mousse filling between the layers. The mousse filling doubles as frosting without making it too sweet. I hope you love it."
.jpg)
.jpg)
photo by Clever Camo Cook

- Ready In:
- 1hr 5mins
- Ingredients:
- 21
- Yields:
-
1 large 3 layer cake
- Serves:
- 12-16
ingredients
-
For the cake
- 3⁄4 cup sorghum flour
- 3⁄4 cup tapioca flour or 3/4 cup potato flour
- 3⁄4 cup rice flour
- 1 1⁄2 cups cocoa
- 1 cup semi-sweet chocolate chips
- 4 1⁄2 teaspoons baking soda (corn free brand)
- 1 7⁄8 teaspoons cream of tartar
- 2 1⁄4 teaspoons xanthan gum
- 1 1⁄8 cups unsalted butter
- 1⁄2 teaspoon salt (if you use salted butter do not add additional salt)
- 1 1⁄8 cups brown sugar
- 1 1⁄2 cups granulated sugar
- 4 1⁄2 large eggs
- 3 egg yolks
- 3 teaspoons vanilla
- 1⁄4 cup coconut milk (or 1 1/2 cup milk plus 1/2 Tablespoon lemon juice, let set for 5 mins) or 2 1/4 cups buttermilk (or 1 1/2 cup milk plus 1/2 Tablespoon lemon juice, let set for 5 mins)
- 1 -2 teaspoon butter, for greasing the pan
-
For the chocolate mousse filling or frosting
- 4 tablespoons unsalted butter (divided and very soft)
- 3⁄4 - 1 cup semi-sweet chocolate chips (high quality, I used Ghirardelli chocolate. You can also use block chocolate, same measurements)
- 2 cups heavy whipping cream (very cold, I put in the freezer for about 10-15 mins prior to use)
- 1 teaspoon vanilla extract (or 1/2 tsp dark rum with 1/2 tsp vanilla extract)
directions
-
Start by making the Cake:
- Preheat the oven to 350 degrees. Lightly grease the bottom of (3) 9" round pans. (I used a basic 3 pack of tin foil pans located in the baking section of the grocery store.) Set butter out on counter so it can soften at room temperature, salt for cake and filling. Put a metal bowl in the freezer to chill so it will be ready when you make the mousse.
- Sift flours together (sorghum flour, tapioca flour, and white rice flour). Add cocoa, xanthan gum, baking soda, cream of tarter and salt. (note: if you are using salted butter do NOT add salt.) (note: if you do NOT have a corn allergy you can replace 4 1/2 teaspoons baking soda and 1 7/8 cream of tarter with 3/4 teaspoon baking soda and 3 3/4 teaspoons baking powder.).
- In a separate large bowl, beat the butter until creamy (note: the longer you leave it setting out at room temperature the easier this will be). Slowly add the brown sugar and granulated white sugar, whip until fluffy.
- Add the eggs and egg yolks one at a time to the butter sugar mixture. Then add the vanilla.
- Turn the mixer to low and alternately add the flour mixture and coconut milk to the butter/egg/sugar mixture. (note: it will be very thick and difficult to mix, just take your time so it gets consistently mixed at each point).
- Pour (or scoop) equal amounts of the mixture into the prepared pans. Bake for 30-35 minutes until the cake is springy to the touch and a tooth pick comes out clean. Set on cooling racks to cool. Let the cakes cool completely before attempting to stack. If you would like a smooth edge you can trim the cakes to be the same size prior to adding chocolate mousse layers.
-
While the cake is baking, prepare the mousse filling/frosting (I made a double batch):
- Cut the butter into small cubes. In a small microwaveable bowl, combine the chocolate chips and butter. Melt in the microwave for 20-30 seconds at a time until smooth. Be careful not to boil he chocolate as it will change the consistency of the mousse and make a huge mess in the microwave.
- Add vanilla and 1/2 cup of heavy whipping cream to the chocolate/butter mixture until combine.
- Remove metal bowl from freezer, combine chocolate/butter mixture and remaining heavy whipping cream using a hand mixer. Whip until smooth and firm peaks begin to form. Do not over whip as the mousse will break and have a graining appearance. Cover mousse with plastic wrap and place in the refrigerator until ready to use.
-
Putting the cake together:
- Put a small amount of mousse and spread it in the center of the pan or plate you are making the cake on, this will keep it from moving while you frost it.
- Place the first layer of cake on top of the mousse, cover the top of the cake with mousse mixture. Repeat by stacking the next layer on top of the mousse. Using a cake knife or smooth spatula, cover the outside of the cake with mousse (the same way you apply frosting to a cake). Using a decorating bag filled with remaining mousse mixture, decorate the edges and top of the cake. If the mousse starts to melt or if your work space is warm, you may need to move mousse back to the refrigerator between layers to prevent it from melting). You can also use shredded coconut, chocolate chips, or chocolate shavings if you prefer for decoration.
- Refrigerate until ready to serve and left overs. I refrigerated mine over night before serving and it was still delicious and moist for 3-4 days after cutting.
Questions & Replies

Got a question?
Share it with the community!
Reviews
-
 Was not good! It was not a very well written recipe! It was dry and the mouse was bad. I do not recommend this recipe
 -
 there is a type-o in the recipe