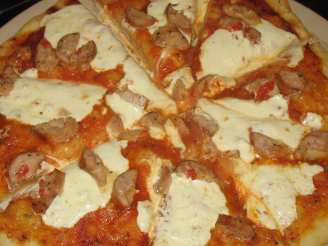
Basil and Garlic Grilled Pizza Dough - - Awesome

"I got this recipe off of allrecipes.com. I figured it had to be good because it was given top ratings by 216 people. Well, they weren't wrong! Grilling pizza takes it to a whole new level. It tastes like it was baked in a wood burning oven. I have avoided grilling pizza in the past because I thought it wasn't worth the effort. I thought it would be messy and I'd most likely burn the pizza. I can't tell you how wrong I was! Grilling pizza is much faster than baking and the crust gets infused with the smoky flavors from the grill. And the best part? It only takes a few minutes to grill and you don't have to worry about your house getting over-heated on a hot summer's day."


- Ready In:
- 2hrs 8mins
- Ingredients:
- 12
- Yields:
-
16 16 slices
- Serves:
- 16
ingredients
- 1 (1/4 ounce) package active dry yeast
- 1 cup warm water
- 1 pinch white sugar
- 2 teaspoons kosher salt
- 1 tablespoon olive oil
- 3 1⁄3 cups all-purpose flour
- 2 garlic cloves, minced
- 1 tablespoon chopped fresh basil leaf
- 1⁄4 cup olive oil (may use less)
-
TOPPINGS
- 2 -4 tablespoons tomato sauce or 2 -4 tablespoons pizza sauce
- 2 tablespoons fresh torn basil leaves
- 1⁄2 - 1 cup shredded mozzarella cheese
directions
- Add one packet yeast to one cup warm water (between 110 and 115 degrees F) and stir to dissolve. Add in the sugar and let sit (proof) for 10 minutes or until frothy. Hint - - the water should be pleasantly warm - not hot. If the water is too hot, it will kill the yeast. I proof the yeast in a glass measuring cup.
- Pour the yeast mixture in a large bowl and add salt, 1 tablespoon olive oil, and flour. Mix together by hand until the dough pulls away from the sides of the bowl.
- Turn dough onto a lightly floured surface and knead until smooth, about 5-8 minutes.
- Coat a bowl on bottom and sides with olive oil and place the dough in the well oiled bowl. I give the dough a couple of swirls around the bowl to make sure the entire surface of the dough is coated in oil. Cover with a damp cloth and set in a warm place to raise. Let dough rise until doubled in size, about 1 hour.
- Punch down and knead in garlic and fresh basil. Place dough back in oiled bowl and cover, again, with damp cloth. Set aside, again, in warm place and let rise for 1 more hour, or until doubled. (To speed up rising, I have put the dough in an oven-safe glass bowl and placed in a 200 degree oven).
- Once the dough has risen for a second time, punch it down and divide in half. Form each half into an oblong shape 3/8 to 1/2 inch thick.
- I was able to just press out the dough onto a dinner plate and used that for the size of my pizza. It all depends on the workability of your dough. You may be able to just manipulate it with your fingers, or you may want to roll it out on a lightly floured surface using a rolling pin - the method is really up to you.
- Brush grill grates with olive oil and then preheat grill to high heat. I let the grill heat up for about 10 minutes.
- Carefully place one piece of dough on hot grill. With a spatula, I was able to slide the dough off the plate onto the grill. I have heard that another method is to spray a rimless cookie sheet with cooking spray and the dough will slide off easily onto the grill.
- Once on the hot grill, the dough will probably begin to puff almost immediately. Once the bottom of the crust has lightly browned (anywhere from 2-4 minutes - - you'll know because it becomes stiff and easy to lift with your spatula) turn the dough over.
- Now, here is where time is of the essence. Working quickly, brush the pizza with your desired sauce (I did this wearing an oven mitt to protect my hand from the heat. Just be careful and, if you need to, slide the dough to the edge of the grill to avoid the open flame and move the dough back over the flame once you've added your toppings.) You want to go light with your toppings because you want the top to cook and the cheese to melt without burning the bottom of your crust. I recommend using light sauce and no more than two toppings with the cheese.
- After you've brushed on your sauce, sprinkle the basil over the sauce and top with the mozzarella cheese.
- Close the grill lid and let the cheese melt for 2-4 minutes, checking every now and then to make sure the bottom isn't burning.
- Once the cheese has melted, remove the pizza from the grill and set aside to cool for a few minutes while you prepare the second pizza.
Questions & Replies

Got a question?
Share it with the community!
Reviews
Have any thoughts about this recipe?
Share it with the community!
RECIPE SUBMITTED BY

I live in northern Minnesota with my husband. We have a dog, Buddy, who is a shepherd-collie mix. We also have a cat, Tigger, who is a brown Tabby. We both like to cook, but I'm the one that gets our meals on the table on a daily basis. My husband enjoys his role as reviewer/critic. I know a recipe is worthy of a 5-star review when my husband gives me a "top shelf, baby" after finishing his meal. If I don't hear that phrase, it just isn't a 5-star recipe. So far, I've always agreed with his reviews. If I ever think he's wrong, I'll have to rethink our system!
I've never been a really good cook, but I've always been great at following directions. Thanks to recipezaar, I just have to find the great recipes and they make me look good! It really doesn't get any better than that!