Butter Croissants

"This recipe makes the best croissants. Be sure to use real butter. If you don't, the recipe will not turn out. If it were simply a matter of taste I would say use whatever you want, but in this case you have to use real butter because of its baking properties. I prefer to use salted butter but you may use unsalted if you wish. The preparation time is just a guess because you never know how long it's going to take for them to rise. I usually let mine rise for a bare minimum of 4 hours. So you may want to keep that in mind if you plan on serving them at a certain time.
Note: If you wish to measure the flour by weight rather than by volume, 2 7/8 cups of flour is approximately equal to 12.68 ounces or 359 grams."
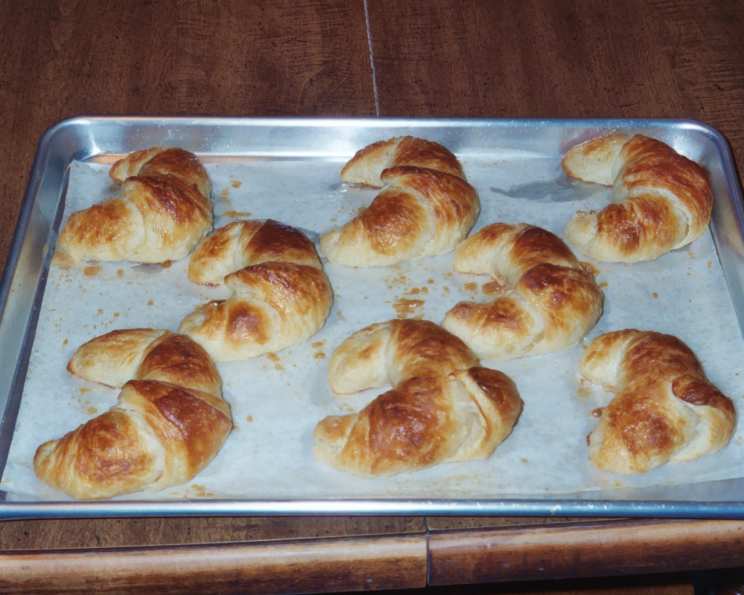
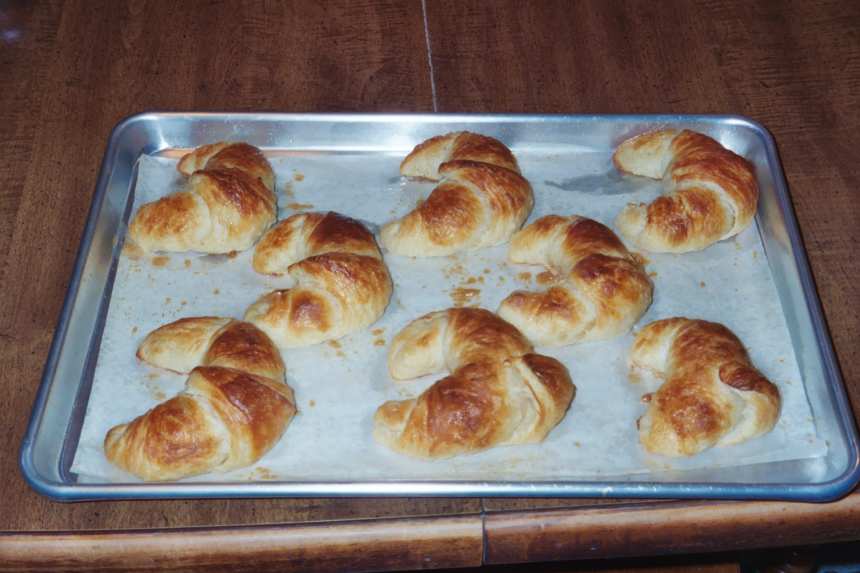
photo by danishpastrychef


- Ready In:
- 8hrs 15mins
- Ingredients:
- 9
- Yields:
-
16 croissants
- Serves:
- 16
ingredients
-
Butter roll-in
- 1 1⁄4 cups cold butter
- 3 tablespoons all-purpose flour
-
Dough
- 1 (1/4 ounce) package active dry yeast (not rapid rise)
- 1 1⁄4 cups milk, heated to about 110 F
- 2 teaspoons sugar
- 1 1⁄2 teaspoons salt
- 2 7⁄8 cups all-purpose flour
-
Egg wash
- 1 egg
- 1 teaspoon water
directions
- Combine the butter and the 3 tablespoons of flour using two knives or a pastry blender.
- Place the butter mixture between two sheets of waxed paper and beat it with a rolling pin until it becomes soft and malleable. Make sure the butter stays cold though. When you're making laminated doughs such as croissant dough, puff pastry dough, or danish pastry dough it's important that the dough stays cold so the butter and the dough form distinct layers.
- Shape the block of butter into a 6- by 8-inch rectangle.
- Place the block of butter somewhere cool or back in the refrigerator while you make the dough. Don't let the butter re-harden though. If the butter re-hardens it will break through the dough when you go to roll it out. You want the butter cold but you also want it to be spreadable.
- For the dough combine the milk, yeast and sugar.
- Let sit 5 minutes or until yeast is dissolved and the surface is all foamy.
- Stir in the salt.
- Stir in the 2 7/8 cups of flour, all at once, until thoroughly combined. You should have a very soft wet dough.
- Cover the bowl of dough and place it in the refrigerator until it's chilled. If the dough is warm it might cause the butter to melt.
- Using a shaker or a sifter, generously flour your work surface. By generously I don't mean a simple dusting. You want a good substantial layer of flour. If you can see the counter top or table top underneath the flour then you need to sprinkle on more. This dough is very wet and if you don't use enough flour on your work surface the dough is going to stick. Don't add anymore flour to the dough itself because the flour you use to roll out the dough is only going to be on the surface of the dough, and it's going to be brushed away.
- Roll the dough into a 10- by 14-inch rectangle. Brush away the excess flour on the surface of the dough with a pastry brush.
- Place the block of butter on one side of the dough and fold the other side over and seal the edges.
- Turn the dough so that the fold is on the left and the part that opens is on the right (like the way a book opens).
- Roll the dough into a 9- by 17-inch rectangle. Be sure to check that it's not sticking to the table. When you you roll out the dough you want to use smooth even strokes and make sure you don't roll over the edge of the dough. If you do you'll crush the layers you're trying to make.
- Use a pastry brush to brush away ALL excess flour off the surface of the dough. This step is important because if you don't it will keep the dough from forming the layers properly.
- Fold 1/3 of the dough on to itself.
- Brush away the flour.
- Fold the other third of the dough on top of that so that the dough resembles a folded business letter. Be sure to keep the edges and corners lined up. This is what's called a "turn". A turn gets its name because each time you roll out the dough you have to turn it a quarter turn so the position of the dough is always the same each time you roll it out.
- Roll out the dough and fold the dough in thirds as you did before.
- At this point you should wrap the dough up and refrigerate it for 45 minutes to an hour.
- Repeat the rolling and folding in thirds like a business letter two more times. Refrigerate the dough for an hour between each turn. Before rolling out the dough each time make sure you always position the dough so that the top flap has the fold on the left and the part that opens on the right. After the 4th turn the dough needs to be refrigerated for at least 3 hours or overnight if it's more convenient.
- Roll the dough into a 10- by 20-inch rectangle. Be sure the corners are square.
- Cut the dough into eight squares by cutting it half lengthwise and then cutting each half into 4 squares. A pizza cutter is a great tool for this job.
- Cut each square into two triangles.
- Take one of the triangles and stretch it until the two short sides are as long as the long side ( the hypotenuse in case you've forgotten your geometry).
- Roll up the triangle and curve the ends in slightly to form a crescent shape.
- Repeat with the rest of the triangles of dough.
- Place the croissants at least 2 inches apart on baking sheets that have been lightly sprayed with cooking spray or covered with parchment paper.
- Cover the croissants with towels and place somewhere where it's not too warm. You don't want the butter in them to become soft remember.
- Let croissants rise until they're nearly doubled in size. This may take a few hours. Be patient. I've let them rise for as long as 5 to 6 hours. After about 2 hours the surface of the croissants may start to dry out. If this happens cover them with a damp paper towel and then put another towel on top of that.
- Combine the egg and the teaspoon of water.
- Brush a light coating of egg wash on each croissant. If the croissants are exceptionally puffy you'll need to be extra gentle when you brush on the eggwash. Another option is to put the eggwash in a spray bottle and spray the eggwash on the croissants.
- Bake the croissants in a preheated 425° F oven for 12 to 15 minutes until they're golden brown.
Questions & Replies

Got a question?
Share it with the community!
Reviews
-
 Wow-za ! Super yummy. I skipped the flour in the butter and just spread room temp butter on the cold dough and chilled it. Then followed the rest of the directions about folding rolling and chilling. These are much better than any restaurant or bakery I've ever had them from because they have whole ingredients ever read the ingredients on the case at Costco? Not good . My family loved these. My children couldn't wait for dessert last night. I sprinkled a few chocolate chips on them before rolling them into croissants and they were amazing. I did half plain also and those were fantastic to. Just depends on your mood. Next time I will just drizzle melted chocolate on top so I can make them into desert to use them for sandwiches. I'm hoping the dough will freeze well because I'm going to pre make these and pop them in the oven as needed for home lunches and breakfast. This is a keeper and will be making often .Thank you for the recipe :)
 -
 These are time consuming but definitely worth it in the end. Even if they don't look perfect they make the ones you buy at the store taste like cheap dinner rolls. I had a little trouble at first when I was shaping the croissants until I learned to just leave the dough triangle on the table and use my fingertips to stretch the triangle of dough out to the proper size.
 -
 These were excellent! The process was a bit long but the result was worth it! I didn't soften my butter at all and just used a box grater to grate the butter and just rolled it into the dough. The recipe makes a lot of croissants and I only used half the dough the first day and then used the rest a couple of days later (from the fridge) to make a croissant loaf - which made EXCELLENT sandwiches. Thank you for the great recipe and wonderful directions!
 -
Oh my gosh! These croissants are nothing like the ones I used to get from the bakery department at the grocery store. I never knew what a good croissant was suppose to taste like until I made these. I'll admit that the recipe is rather involved and time consuming but it's worth it. I just wish they'd rise faster.