Cake - Dorothy's Ruby Slippers

"Caution: Not for the timid or beginner baker. ***When I offered to make the cake for my friend's daughters Oz themed bday party, I thought for sure I could find a really fun ruby slipper cake online. But all I found were over the rainbow cakes or cakes using oz figurines - these were not creative enough for me. So I created Dorothy's Ruby Slipper Cake. I allowed myself 4 days of doing cake stuff before the party day because I didn't want to get over tired trying to do it all at once. But it can probably be done in two days - one day for baking and freezing and one day for building and frosting. Or I suppose one day if you woke up early enough.
***To make building the cake easier, you will need a long serrated bread knife, I wide spatula and a long narrow spatula - see pic 1. You will also need a 9x13" cake pan, two 8" loaf pans, an electric mixer, and a double boiler.
***The frosting recipe I use is Fluffy 7 Minute Frosting #22181 by Caryn. I have included it here.
***Good Luck and Enjoy!"
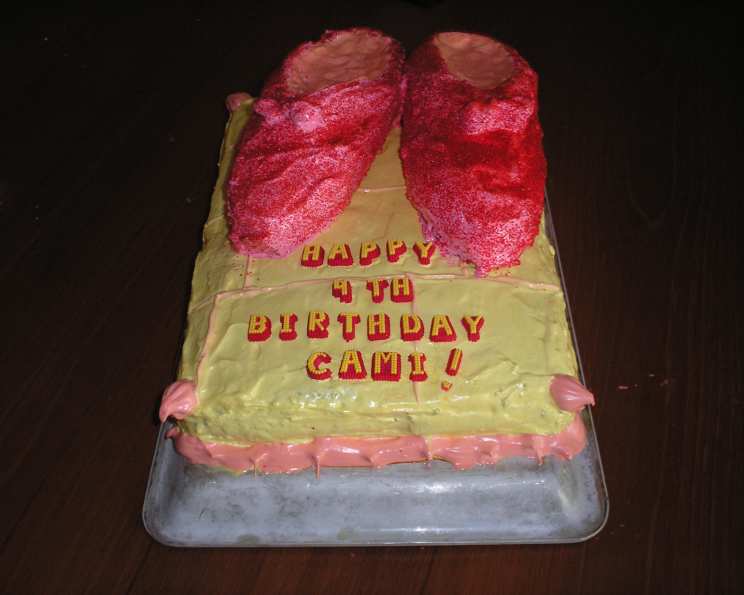
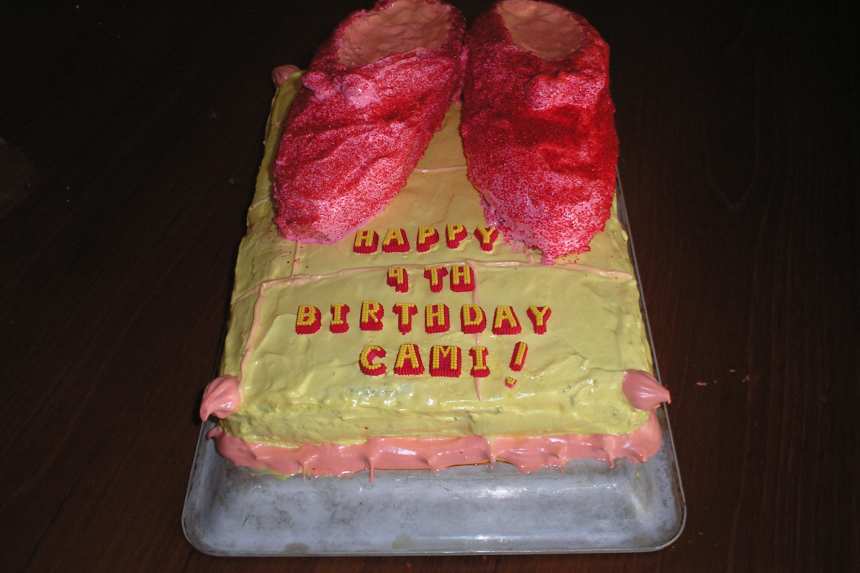
photo by Jodi Consoli


- Ready In:
- 51hrs 30mins
- Ingredients:
- 22
- Yields:
-
1 cake
ingredients
-
Jello Cakes
- 1 (18 1/4 ounce) box cake mix (yellow or lemon)
- 1 (18 1/4 ounce) box cake mix (strawberry)
- 1 (3 ounce) box lime Jell-O gelatin
- 1 (3 ounce) box strawberry Jell-O gelatin dessert
- 1 1⁄2 cups vegetable oil (divided)
- 1 1⁄2 cups water (divided)
- 8 eggs
-
Single Recipe Frosting
- 1 1⁄2 cups sugar
- 1⁄4 cup water
- 2 egg whites
- 2 tablespoons light corn syrup
- 1⁄4 teaspoon salt
- 1 teaspoon vanilla
- yellow food coloring
-
Half Recipe Frosting
- 3⁄4 cup sugar
- 1⁄8 cup water
- 1 egg white
- 1 tablespoon light corn syrup
- 1⁄8 teaspoon salt
- 1⁄2 teaspoon vanilla
- red food coloring (it is nearly imposible to get a true red)
- colored sprinkles (red)
directions
-
BAKE THE CAKES:
- I baked the cakes on two different days; for each cake preheat the oven to 350*F.
- Add 1 box of cake mix, 1 box of jello (lime jello with the yellow cake, strawberry jello with the strawberry cake), 3/4 cup oil, 3/4 water, and 4 eggs in a large bowl.
- Mix on low with an electric mixer, when ingredients are moistened, mix on high for 3 minutes.
- For the yellow cake, use a 9X13", greased pan for baking.
- Bake at 350* for 40 minute.
- Use caution, this type of cake can fall if it is disturbed early.
- For the strawberry cake, divide the batter evenly between 2 8", greased, loaf pans.
- I am unsure of the baking time for the loaf pans, I would carefully check them at 30 minutes and add time accordingly.
- Doneness of the cakes can be tested with a toothpick poked in the center to see if it comes out dry or wet.
- After cakes have cooled, remove from pans and freeze at least 3 hours for easy in cutting and shaping.
-
MAKE THE FROSTING:
- Using Caryn's 7 Minute Frosting recipe, you will need at least one and half batches; you can make two full batches if you want, but I don’t think it is necessary.
- For each batch of frosting, add the appropriate amount of sugar, water, egg whites, corn syrup and salt in the top of a double boiler (I use a heat proof glass mixing bowl on top of a sauce pan as I don't have a double boiler).
- Blend.
- Place over simmering water.
- With an electric mixer, beat the mixture constantly at high speed for 7 minutes or until the mixture triples in volume and holds firm peaks.
- Remove from heat add the appropriate amount of vanilla and the appropriate food color for either a full recipe or a half recipe.
- Frosting can be stored in an airtight container in the refrigerator until ready to use.
-
BUILD THE YELLOW BRICK ROAD:
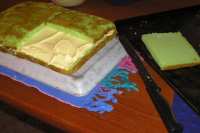
- After freezing yellow (green) cake for 3 hours or more, use a serrated bread knife to divide the cake in half horizontally.
- Now carefully cut the top layer in half vertically.
- Cut the top layer in half again, this time from the other side of the cake.
- The top layer is now cut into four equal rectangles.
- Carefully remove each rectangle using a wide spatula and set aside.
- Frost the bottom layer with yellow frosting reserving enough to frost the top layer and the sides of the cake(see pic 2).
- Replace the rectangles and frost top and sides with the remaining yellow frosting.
- If you like, use an accent color "draw" the lines of the bricks on top of the frosting - I did this, but I don't think it added to the over all affect.
-
CARVE AND FROST THE RUBY SLIPPERS:
- On a piece of paper about 8 1/2 inches long by 4 inches wide draw the rough shape of the sole of a shoe; this is your pattern, make sure your drawing is not bigger than the loaf, it should go to the edges of the loaf.
- Cut out your pattern.
- After freezing loaf cakes for at least 3 hours, remove 1 loaf from the freezer.
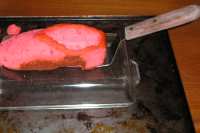
- Use tooth picks to secure the pattern to the top of the loaf (see pic 3).
- Begin to carve the loaf into the shoe shape.
- Make a small indentation on each side at the bottom to resemble a heel.
- Remove the pattern.
- Cut away a little cake at a time to form the shape of the toe of the shoe.
- Cut diagonally down for about two thirds of the length towards the toe to give the effect of high heels.
- Round the edges.
- Carve out a shallow indentation in the top 1/3 that is still level to create the mouth of the shoe.
- If necessary, freeze again for an hour to make frosting easier.
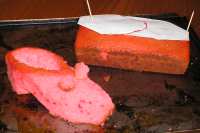
- Turn an 8x8" baking dish upside down; this is to get the shoe higher up so the edges can be more easily frosted and sugared.
- Place the long, narrow spatula on top of the baking dish.
- Put the shoe cake on top of the spatula, the heel of the shoe should be near the handle (pic 4).
- Frost with red frosting.
- Sprinkle with red sugar.
- Now the tricky part, with one hand begin to lift the shoe with the long spatula.
- If necessary, use another spatula to help lift the other end.
- Slowly and carefully place the shoe on the yellow brick road so the toe and heel are going in the long (13") direction of the cake-you pretty much only have one shot at this.
- Repeat with second loaf cake (see pic 5).
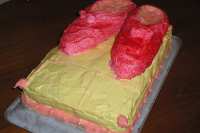
- Add wording or accent frosting if you choose (see pic 6).
- Refrigerate if you do not plan on serving the cake for several hours - or days.
- I suggest making this cake at the house where it will be served; I only had to drive 7 miles with the one I made, but it was uphill and winding; the shoes are just balanced on top, so it was a nerve racking drive! I don't think I breathed the whole way.
- P.S.
- You will get your quota for sugar and food color when you eat this cake.
Questions & Replies

Got a question?
Share it with the community!
Reviews
Have any thoughts about this recipe?
Share it with the community!
RECIPE SUBMITTED BY

Jodi Consoli
United States