Crisp Snow Pea Salad

"A simple Japanese dressing turns crunchy snow peas into a refreshing salad. Great with grilled salmon or chicken. Created by Heather Trim for Food and Drink."
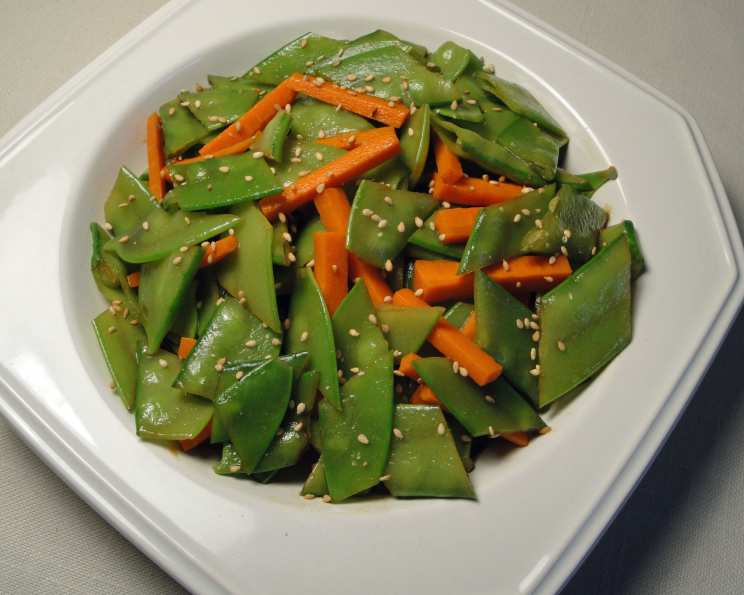
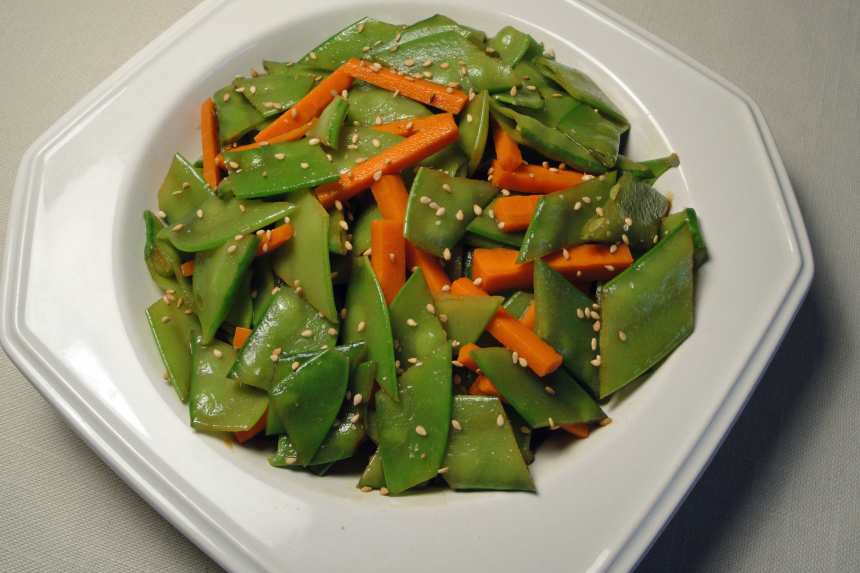
photo by Debbwl


- Ready In:
- 10mins
- Ingredients:
- 9
- Serves:
-
4-6
ingredients
- 1 lb snow peas
- 1⁄4 cup very thinly sliced carrot (Matchstick size)
- 2 tablespoons soy sauce
- 2 tablespoons lemon juice
- 1 tablespoon dark sesame oil
- 2 1⁄2 teaspoons granulated sugar
- 1⁄2 teaspoon wasabi powder
- salt
- 2 teaspoons sesame seeds, preferably toasted
directions
- Snip ends and remove string from snow peas. Fill a large bowl full of ice water.
- Bring a large saucepan of salted water to a boil, and add snow peas and carrots.
- Cook just until snow peas turn bright green, about 15 seconds, drain and plunge into cold water. Drain well and pat dry.
- Cut snow peas diagonally into ½-inch (1-cm) wide pieces. Place in a bowl along with carrots.
- To prepare dressing, whisk soy with lemon juice, sesame oil, sugar and wasabi powder, making sure sugar and wasabi powder are dissolved.
- Stir with snow peas and carrots. Taste and add salt if needed. Sprinkle with sesame seeds.
Questions & Replies

Got a question?
Share it with the community!
Reviews
-
 Very delicious--however I pretty much only used the soy sauce and lemon juice for the dressing as I was missing all the other ingredients..still absolutely wonderful!
 -
 This recipe is incredibly simple and delicious. I was pleasantly surprised by the mouth-watering flavor created with the combination of the lemon juice with the soy sauce. I highly recommend this recipe!
 -
 This is a pretty darn good salad. I used snow peas from my garden. I had maybe 12 oz snow peas this time, and some extra carrots I needed to use up, so the veggie ratio was a little different. The wasabi is not pungent at this level, but I think if you add too much, you may lose the delicate flavors of the veggies.
 -
 Enjoy the taste but beware the prep time (30 min. actually!). I rate this recipe 4 stars for taste but 2 stars for incorrect prep time listed and a few other detractors. I substituted honey for the sugar and added a bit more wasabe since 1/2 tsp doesn't even leave a hint of wasabe flavor, and I wanted only a hint. However, the prep time of 10 minutes is wrong. It took me 30 minutes, and I didn't even do the step of removing the strings - way too much trouble! Also, drying the peas after submerging in ice water (to stop the blanching process) took some time - spreading out on towels to soak up excess water. Lastly, the lemon juice discolors the peas, so if you want to make this recipe ahead of time and eat it the next day, you may not want "bleach" marks on the peas where they appear whitened (although this is certainly normal for lemon juice - I guess you could consider vinegar instead - but that would give a very different flavor). Hope this is helpful to someone!
 -
A very satisfying salad that is a delightful change of pace had to go to an Asian store to find wasabi powder but I'm so glad I did as it really does make the dressing. This would be good for family get-togethers and pot lucks if I pack the dressing and veggies separately and then dress at the last minute. Thanks for the post.
see 5 more reviews
Tweaks
-
Seasoned rice vinegar instead of lemon juice, no aded sugar, no added salt. 3/4 lb snow peas (end of my season) and approximately twice the carrots, because I needed to use some up. It is not necessary to have the exact amounts on the veggies. Try the dressing on sliced cucumbers! My snow peas don't have strings, and drying the peas? Fuhgedaboutit! Not necessary. Just drain well, shaking the colander a few times.
-
Enjoy the taste but beware the prep time (30 min. actually!). I rate this recipe 4 stars for taste but 2 stars for incorrect prep time listed and a few other detractors. I substituted honey for the sugar and added a bit more wasabe since 1/2 tsp doesn't even leave a hint of wasabe flavor, and I wanted only a hint. However, the prep time of 10 minutes is wrong. It took me 30 minutes, and I didn't even do the step of removing the strings - way too much trouble! Also, drying the peas after submerging in ice water (to stop the blanching process) took some time - spreading out on towels to soak up excess water. Lastly, the lemon juice discolors the peas, so if you want to make this recipe ahead of time and eat it the next day, you may not want "bleach" marks on the peas where they appear whitened (although this is certainly normal for lemon juice - I guess you could consider vinegar instead - but that would give a very different flavor). Hope this is helpful to someone!
RECIPE SUBMITTED BY

<p>I am no longer an active member of this site.</p>
<p>thank you to all who try my recipes!</p>
<p><br /><br />*No one can make you feel inferior without your consent</p>
<p><img src=http://i195.photobucket.com/albums/z205/jubespage/zwt6%20banners%20and%20photos/hostanimation.gif alt= width=150 height=200 /></p>
<p><img src=http://i195.photobucket.com/albums/z205/jubespage/ZaarBanners/banner32.jpg alt= width=170 height=165 /><br /><img src=http://i80.photobucket.com/albums/j166/ZaarNicksMom/Animation6.gif alt= /> <br /><img src=http://i80.photobucket.com/albums/j166/ZaarNicksMom/PACsticker-Adopted.jpg alt= /> <br /><img src=http://i23.photobucket.com/albums/b399/susied214/permanent%20collection/participantbannerzwt5.jpg border=0 alt=Photobucket /> <br /><img src=http://i23.photobucket.com/albums/b399/susied214/permanent%20collection/BtoBHosts.jpg border=0 alt=Photo Sharing and Video Hosting at Photobucket /> <br /><img src=http://i195.photobucket.com/albums/z205/jubespage/2008AussieNZChristmasCardExchange.gif alt= /> <br /><img src=http://i250.photobucket.com/albums/gg271/MrsTeny/AMpageSticker.jpg border=0 alt=Photobucket /> <br /><img src=http://i195.photobucket.com/albums/z205/jubespage/AussieRecipeSwap.gif alt= /><img src=http://www.satsleuth.com/cooking/Swap14.JPG alt= /> <br /><img src=http://i7.photobucket.com/albums/y254/Missymop/rotaruarascals.jpg border=0 alt=Photobucket /> <br /><img src=http://www.satsleuth.com/cooking/RecipeSwap2.JPG alt= width=50% /> <br /><img src=http://i23.photobucket.com/albums/b399/susied214/permanent%20collection/Adopted1smp.jpg border=0 alt=Photo Sharing and Video Hosting at Photobucket /><img src=http://i23.photobucket.com/albums/b399/susied214/permanent%20collection/smPACp.jpg border=0 alt=Photo Sharing and Video Hosting at Photobucket /> <br /><br /><img src=http://i71.photobucket.com/albums/i148/Sage65/teambanner2.gif alt= /> <br /><br /><img src=http://i23.photobucket.com/albums/b399/susied214/projects/200_PACpic.jpg border=0 alt=Photo Sharing and Video Hosting at Photobucket /><img src=http://i23.photobucket.com/albums/b399/susied214/projects/pacbanner.jpg border=0 alt=Photo Sharing and Video Hosting at Photobucket /> <br /><img src=http://i23.photobucket.com/albums/b399/susied214/purplechefhat.gif alt=Image hosted by Photobucket.com /><img src=http://i23.photobucket.com/albums/b399/susied214/projects/untitled_1.jpg border=0 alt=Image hosting by Photobucket /><img src=http://i23.photobucket.com/albums/b399/susied214/beartag_1_1.jpg border=0 alt=Photobucket - Video and Image Hosting /><img src=http://i23.photobucket.com/albums/b399/susied214/permanent%20collection/untitled.jpg border=0 alt=Photobucket - Video and Image Hosting /><img src=http://i23.photobucket.com/albums/b399/susied214/permanent%20collection/200_artistrichardneuman-art-prints_.jpg border=0 alt=Photobucket - Video and Image Hosting /></p>