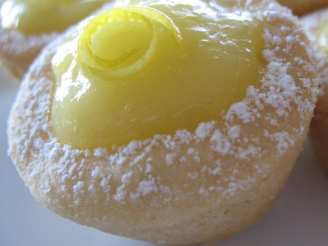
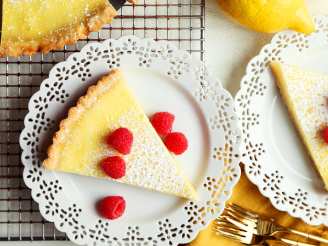
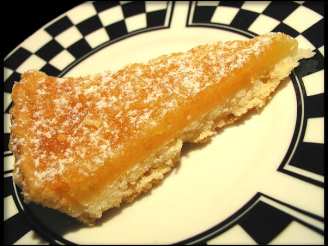
Double-Decker Lemon Tart

"Cooking time does not include 4 hour chilling time."


- Ready In:
- 1hr 5mins
- Ingredients:
- 19
- Serves:
-
8-10
ingredients
- 1 (15 ounce) package refrigerated pie crusts
- 1 cup whipping cream
- 1⁄4 cup sugar
-
Garnish
- lemon slice
-
Tangy Lemon Tart Filling
- 1 cup sugar
- 3 tablespoons cornstarch
- 1⁄2 cup fresh lemon juice (about 4 large lemons)
- 4 large eggs, lightly beaten
- 1⁄4 cup butter, melted
- 2 drops liquid yellow food coloring
-
Lemon Meringue Pie Filling
- 1 cup sugar
- 1⁄4 cup cornstarch
- 1⁄8 teaspoon salt
- 4 large egg yolks
- 2 cups milk
- 1⁄3 cup fresh lemon juice
- 3 tablespoons butter or 3 tablespoons margarine
- 1 teaspoon grated lemon rind
- 1⁄2 teaspoon vanilla extract
directions
- Unfold and stack piecrusts on a lightly floured surface. Roll into 1 (12-inch) circle. Fit piecrust into the bottom and up the sides of a 9-inch deep-dish tart or quiche pan (about 1 1/2- to 1 3/4-inches deep). Prick bottom and sides of piecrust with a fork. Freeze 10 minutes.
- Line piecrust with parchment paper; fill with pie weights or dried beans.
- Bake at 425° for 10 minutes. Remove weights and parchment paper; bake 12 to 15 more minutes or until crust is lightly browned.
- Pour Tangy Lemon Tart Filling into piecrust; top with Lemon Meringue Pie Filling. Cover with plastic wrap, placing directly on Lemon Meringue Pie Filling. Chill at least 4 hours.
- Beat cream and sugar at medium speed with an electric mixer until soft peaks form. Dollop on top of tart. Garnish, if desired.
- Lemon Meringue Pie Filling:.
- Whisk together first 3 ingredients in a heavy, nonaluminum, medium saucepan. Whisk together egg yolks, milk, and lemon juice in a bowl; whisk into sugar mixture in pan over medium heat. Bring to a boil, and boil, whisking constantly, 1 minute. Remove pan from heat; stir in butter, lemon rind, and vanilla extract until smooth.
- Tangy Lemon Tart Filling:.
- Whisk together sugar and cornstarch in a heavy, nonaluminum, medium saucepan; gradually whisk in lemon juice, eggs, and butter. Cook mixture, whisking constantly, over medium-low heat 8 to 12 minutes or until thick and bubbly. Remove from heat, add food coloring, and let stand 10 minutes.
Questions & Replies

Got a question?
Share it with the community!
Reviews
Have any thoughts about this recipe?
Share it with the community!
RECIPE SUBMITTED BY

<p>I am a wife, mother and nurse. I have 2 boys born in 2002 and 2003. I love to cook and try to make something new at least once a week.The picture is my little boy Luke taking pictures of his dinner like mommy. I have really enjoyed posting pictures and will try to improve and do it more often. <br /><img src=http://i37.photobucket.com/albums/e78/lmillerrn/LukeSamDad.jpg/IMG alt= /> <img src=http://i37.photobucket.com/albums/e78/lmillerrn/engagementpicture.jpg/IMG alt= /> <br /><br /><br /><br /><img src=http://i23.photobucket.com/albums/b399/susied214/beartag_1_1.jpg border=0 alt=Photobucket /> <br /><img src=http://i23.photobucket.com/albums/b399/susied214/adopted_1_1.jpg border=0 alt=Photobucket /> <br /><br /><br /><br /><br /><br /><br /><img src=http://i3.photobucket.com/albums/y53/DUCHESS13/FFF/completedbanner.gif alt= /> <br /><br /><img src=http://i23.photobucket.com/albums/b399/susied214/projects/FinishedJollyRoger_1.jpg border=0 alt=Image /> <br />[IMG]http://i37.photobucket.com/albums/e78/lmillerrn/FemCrewnamescomplete.jpg[/IMG] <br /><br /><a href=http://photobucket.com target=_blank><img src=http://i37.photobucket.com/albums/e78/lmillerrn/FemCrewnamescomplete.jpg border=0 alt=Photo /></a> <br /><img src=http://i3.photobucket.com/albums/y53/DUCHESS13/World%20Tour/ZWT2.gif alt= /> <br /><img src=http://i23.photobucket.com/albums/b399/susied214/permanent%20collection/untitled.jpg border=0 alt=Photobucket /> <br /><img src=http://i23.photobucket.com/albums/b399/susied214/permanent%20collection/200_artistrichardneuman-art-prints_.jpg border=0 alt=Photobucket /> <br /><img src=http://i3.photobucket.com/albums/y53/DUCHESS13/FFF/Switzerland-FFF4.gif alt= /> <br /><br /><img src=http://i23.photobucket.com/albums/b399/susied214/projects/200_PACpic.jpg border=0 alt=Photo /> <br /><br /><br /><img src=http://i23.photobucket.com/albums/b399/susied214/projects/pacbanner.jpg border=0 alt=Photo /> <br /><br /><img src=http://i23.photobucket.com/albums/b399/susied214/permanent%20collection/Adopted1smp.jpg border=0 alt=Photo /> <br /><img src=http://i23.photobucket.com/albums/b399/susied214/permanent%20collection/smPACp.jpg border=0 alt=Photo /></p>