Community Pick
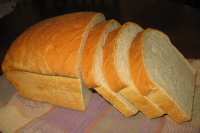
Julia Child's White Bread

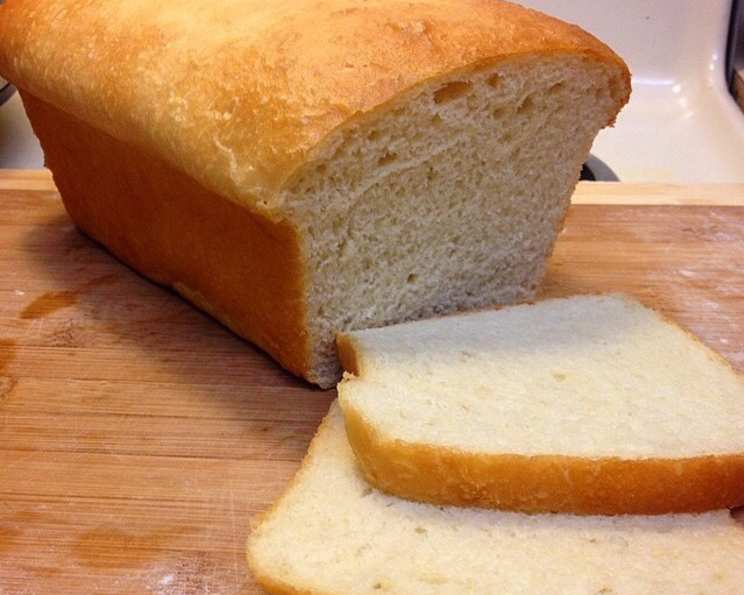
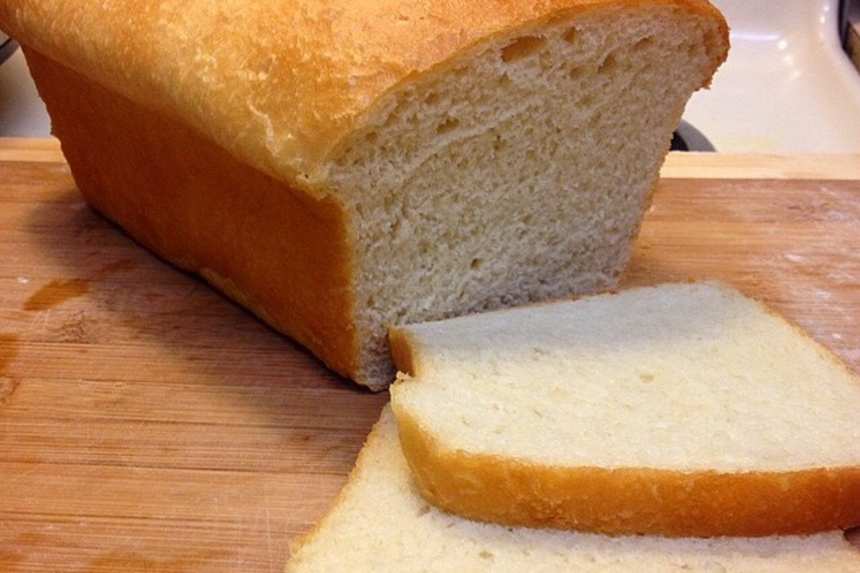
photo by revtonyg_12914062


- Ready In:
- 3hrs 25mins
- Ingredients:
- 6
- Yields:
-
2 loaves
- Serves:
- 16
ingredients
- 2 1⁄2 cups water (105-115 F)
- 1 tablespoon active dry yeast
- 1 tablespoon sugar
- 7 cups bread flour or 7 cups all-purpose flour
- 1 tablespoon salt
- 1⁄4 - 1⁄2 cup unsalted butter, softened
directions
- Pour 1/2 cup of the water into a bowl and mix with yeast and sugar til foamy.
- Let sit for 5 minutes until creamy.
- Put the yeast mixture, rest of the water and 3 1/2 cups of the flour into the mixer with the dough hook.
- Mix slowly until blended then add the rest of the flour.
- Increase speed and scrape down the sides til the dough comes together.
- (If it doesn't add a tbsp of flour at a time til it does.) Add salt and mix at medium speed for 10 minutes (or do half in mixer and half kneading) til dough is smooth and elastic.
- Back in mixer add butter 1 tbsp at a time (dough may come apart, but mixing will pull it back together).
- Turn dough out on lightly floured surface and shape it into a ball then place in a large buttered or oiled bowl.
- Turn dough so it is completely coated in the fat, then cover in plastic for 45 minutes to an hour, til it has doubled in size at room temperature.
- Butter 2 loaf pans.
- Deflate the dough, cut in half and turn out onto a lightly floured surface.
- Roll out into a 9 x 12-inch rectangle.
- With the short end facing you, fold the dough into thirds like a sheet of paper to go into an envelope, creating a roll.
- Pinch the seam closed, and pinch the ends enough so it will fit in the loaf pan.
- Drop in the loaf pan seam side down, and repeat.
- Cover the loaves with buttered plastic wrap and allow to rise again in a warm place (80°F) for 45 minutes, until they double in size.
- Preheat the oven to 375°F and put the rack in the center of the oven.
- Bake for 35-45 minutes til they are honey brown.
- Immediately turn out of pans onto a rack to cool.
- Once almost completely cool, they can be cut.
- Store in a brown paper bag for a day or two.
- Once cut, turn cut side down onto a cutting board and cover with a kitchen towel.
Questions & Replies

-
Has anyone tried halving the recipe and using a bread machine to mix this recipe? I'm going to give it a whirl anyway, but wondering if there should be any tweaks for future reference.
-
 The loaf pan size is not specified. It would be appreciated. Thanks.
 -
 I like that there are few ingredients and that the recipe is easy to follow. This is not a question, just a suggestion: For the rise, I turn my oven on to 350° for 50 seconds while I'm making the bread, then turn it off. Place my assembled loaves in the warm oven for the rise. Works great, especially in the cooler weather when my kitchen has a chill on it.
Reviews
-
 I just prepared it, today. The bread turned out great. I don't know if its the climate, but I didn't have to put in the last half of cup of flour for the two loaves. They both rose beautifully and the second rising was huge and fluffy. I have to say, the consistency is quite nice and great for sandwich bread. Thanks for sharing such a simple recipe. <br/><br/>I used my Kitchen Aid with a dough hook. I did notice that I had to intermittently use my hands to kneed just like the recipe called for. It is unusual to add salt later and the butter last. I just went along with it as strange and as unusually elastic and seemingly stiff or rubbery as the dough seemed. So, I was a bit worried. <br/><br/>But, to my amazement, after the first rising as it doubled in size, the dough was relaxed and easy to work with just like other more complicated white bread recipes I've worked with, for example; The Joy of Cooking recipe book, which calls for more sugar or eggs, etc. Because I wanted to use a 5'11" bread pan, I only had one... I wrapped the other half of the bread dough in saran wrap and put it in the freezer temporarily to stop it from rising until I finished baking the first loaf. After I was ready to run errands and do the second loaf, it warmed up to room temp and rose just as good as the first loaf. <br/><br/>I am saving one finished loaf in the freezer, now and the other one we will slice into during dinner, tonight. Thanks for posting the recipe.
 -
I love this recipe! That said, I only use it here to remind myself of the General steps and ingredients. Julia's actual recipe calls for 2 rises in the bowl and then a third in the loaf pan, which I find makes all the difference in the both consistency and flavor. The ingredients and some of the details (like adding the salt and butter at different times than "usual") are spot on, but this shouldn't be called Julia Child's recipe when the technique is missing pretty big details.
-
OMG, this bread is wonderful! It came out golden, honey-colored, nice, crisp outside crust, and best of all, has great taste! Loved working with this dough. Didn't need to put in additional flour, at all, after I added the butter. The mixer whipped it right back into shape, pretty as you please! Most definitely a keeper! Thanks for sharing, Gay Laudee C.
-
 OMG! Do I ever love this bread. I have attempted to make bread on many occasions over the years. I have NEVER been successful, until I found this recipe. I made the entire thing by hand. Once I've mixed in the second addition of flour, I sent my timer for 8 minutes exactly and knead. Works like a charm each time. It makes for great toast as well as sandwich bread.
 -
I'm clearly in the minority here, but I dislike this recipe. There's something to be said for bread that rises/ferments for longer periods of time - the resulting fermentation and enzyme/bacteria activity produces a deeper flavor, which isn't possible to attain in a quick-rising bread like this one. It was okay, but the flavor was extremely flat. I love Julia Child, but this one's a miss for me.
see 52 more reviews
Tweaks
-
I use 2 tsp of salt. 1 tbs is just a bit much. It just has a better taste with less salt and a nicer texture.
-
 This is great bread. It is great for sandwiches, garlic bread, and toast. I am making it right now for the second time using Coconut oil instead of butter. I will be doing one loaf in a bread pan and the other as a round loaf. This is easy enough to do with a little one running around also, so that's a big plus.
RECIPE SUBMITTED BY

Gay Gilmore
Seattle, WA
I'm really just learning how to cook, but I hope that my skills at eating will really guide me in this endeavor. ;-) I think that sharing recipes on the internet is better than any cookbook. Of course, I founded Recipezaar, so I might be a little biased.