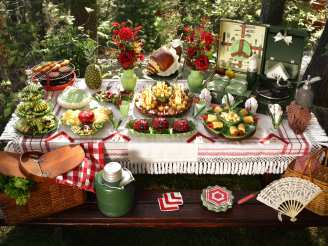
Lady Bug Burger Buns
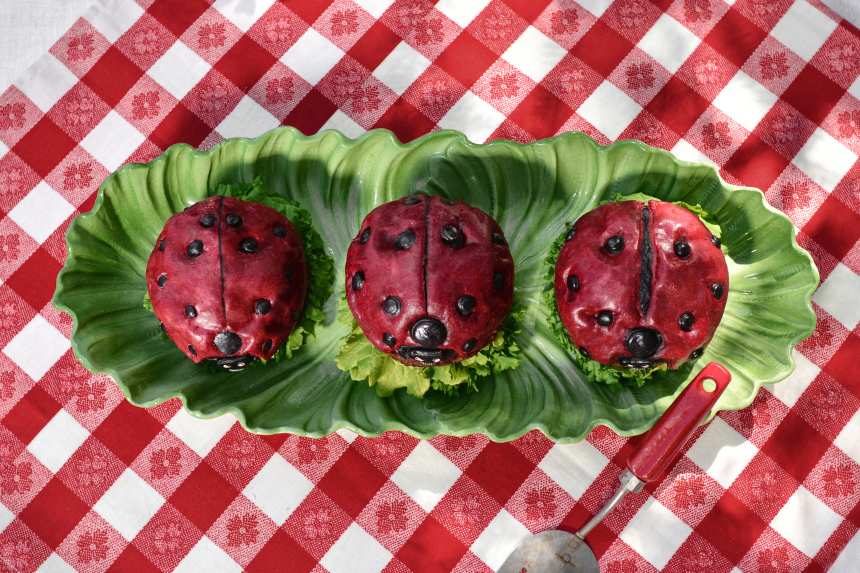
photo by ChristineMcConnell

.jpg)
- Ready In:
- 6hrs 40mins
- Ingredients:
- 38
- Yields:
-
12 buns
ingredients
-
For the Red Lady Bug Dough (no yeast)
- 1 tablespoon red gel food coloring
- 1⁄8 cup room temp water
- 1 cup room temp whole milk
- 1⁄8 cup sugar
- 1 tablespoon unsalted butter, melted
- 1 cup bread flour
- 3 tablespoons bread flour
- 1⁄2 cup all-purpose flour, plus more for working
- 1⁄2 tablespoon salt
- 1 tablespoon melted butter
-
For the Black Dough (no yeast)
- 1 tablespoon black gel food coloring
- 3 tablespoons room temp water
- 1⁄2 cup room temp whole milk
- 3 tablespoons sugar
- 1⁄2 tablespoon unsalted butter, melted
- 1⁄2 cup plus 2 tablespoons bread flour
- 1⁄8 cup all-purpose flour, plus more for working
- 1⁄4 tablespoon salt
- 1⁄2 tablespoon melted butter
-
For the White Dough (no yeast)
- 1 tablespoon white gel food coloring
- 3 tablespoons room temp water
- 1⁄2 cup room temp whole milk
- 3 tablespoons sugar
- 1⁄2 tablespoon unsalted butter, melted
- 1⁄2 cup plus 2 tablespoons bread flour
- 1⁄8 cup all-purpose flour, plus more for working
- 1⁄4 tablespoon salt
- 1⁄2 tablespoon melted butter
-
For the Brioche Buns
- 1 cup warm water (about 100 degrees)
- 2 tablespoons black gel food coloring
- 3 tablespoons warm milk
- 2 teaspoons active dry yeast
- 2 tablespoons sugar
- 2 large eggs
- 3 cups bread flour
- 1⁄3 cup all-purpose flour
- 1 teaspoon salt
- 2 1⁄2 tablespoons unsalted butter, softened
directions
-
Supplies:
- Circular pastry cutters in a variety of diameters. I found all mine at a cake supply shop and even used a straw for the smallest cut outs.
- Large red skin was cut using a 7-inch diameter cutter.
- Small black dots were cut using a 1/4-inch diameter cutter.
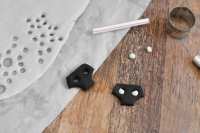
- Face was cut using a 1" diameter cutter and then cut down using a razor.
- Top of spine black dot was cut using a 1/2-inch pastry cutter.
- Straws to cut out eyes.
- Soft pastry brush in several sizes for details and egg wash.
- 1 teaspoon edible black powder paint (for pupils, lines on teeth and line going down spine).
- Vodka to mix powder paints.
- Egg wash (1 egg whisked with a tablespoon of water).
-
Red Lady Bug Dough Directions:
- In a glass bowl combine food color, water, milk and sugar. Whisk vigorously.
- In a separate bowl combine flours and salt. Pour dry ingredients, wet ingredients and butter into a stand mixer fitted with a dough hook. Mix on low roughly five minutes until dough forms. (If dough is too dry and you see crumbs not incorporated after five minutes, you can add a tablespoon more of milk or if it's clearly too sticky you can add a tablespoon of flour.).
- Once the dead dough (Just a way of calling dough free of leavening agents) is mixed, place in a zip lock bag in a cool place until ready to use.
-
Black Dough Directions:
- Repeat Red Dough Directions.
-
White Dough Direction:
- Repeat Red Dough Directions.
-
Decorative Direction:
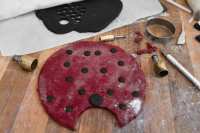
- Rollout red dough and cut with 7-inch circular cutter. Using a 2-inch circular cutter, cut out shoulder and neck area. At the top of the spine, cut out the red with a 1/2-inch cutter and replace with some of the rolled out black dead dough. Then repeat the process with the smaller 1/4-inch cutter over the back keeping your dots balanced on both sides. This is tricky to describe so please see instructional photos.
- After creating each skin and face, seal or cover in an airtight container until ready to apply.
-
Brioche Buns Direction:
- In a glass bowl combine water, sugar and yeast. Allow to rise at least five minutes before using. In another glass bowl combine milk, eggs and food color, whisk vigorously until well mixed. In a medium mixing bowl combine flours and salt.
- Place butter, flour mixture and milk and egg mix into a large stand mixer fitted with a dough hook. Begin mixing on low and add yeast mixture. Allow to mix on low speed for five minutes or until black dough ball forms. Remove from mixer and place in a butter grease steel bowl and cover with a damp cloth in a 75-80 degree F area. (Away from heat, but not cold) for one hour. After an hour you can punch down risen dough, knead on counter and cut into slightly larger than a golf ball, but not as big as a tennis ball shapes. Pinch the edges underneath creating a perfect ball (This is kind of tricky, but just keep manipulating until the smoothest shape is achieved. Place on an individually cut 5X5 inch piece of parchment paper and cover immediately with a large upside-down bowl. Allow each to rise about 45 minutes before covering with lady bug skin.
- Heat oven to 400 degrees F.
- When your black brioche buns have risen, place one at a time onto a baking sheet and gently place skin over the top and delicately tuck the edges underneath. Use egg wash to adhere anything that isn't sticking. Brush the back of your lady bug face in egg wash and place directly onto to bun below the spine cutout.
- Note: In the images I cut a shallow line down the spine before going into the oven. You can do this, but I found the buns held a better shape by not doing this and just painting that line afterward with the powder paint.
- Bake one at a time for 16 minutes. Allow to cool before decoratively painting on the pupils, lines on teeth and line going down spine.
- Once all are done they can be cut and served immediately (the tastiest way) or placed in a Ziploc bag and frozen until ready to be thawed and used.
Questions & Replies
Got a question?
Share it with the community!
Reviews
Have any thoughts about this recipe?
Share it with the community!
RECIPE SUBMITTED BY
ChristineMcConnell
United States
Artist, photographer, baker and author of Deceptive Desserts


.jpg)
