Looking Glass Cookies - Easy Method

"I saw these demonstrated on on old tv show called "Home & Family." These are so pretty and very simple to prepare. They used a large and a small maple leaf shaped cutter for these cookies. Yield will vary depending upon how much dough you have and how big your cookie cutters are - I guessed the yield based on one roll of purchased sugar cookie dough. Baking time is per cookie sheet. Plan to have several cookie sheets available as the cookies must cool completely before removing from the pans."


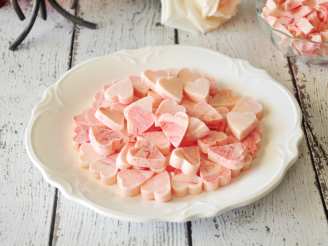
photo by Marg (CaymanDesigns)


- Ready In:
- 40mins
- Ingredients:
- 2
- Yields:
-
36 cookies
ingredients
- 1 batch any cookie dough, chilled
- 10 packages LifeSavers five-flavor roll candy or 10 packages fruit flavored hard candies (such as lollypops, as many as needed)
directions
- *Youmay use any sugar cookie dough recipe you like- to include purchased sugar cookie dough.
- You only need as much dough as will fit on each of your cookie sheets once.
- Separate Life Savers or lollypops (remove sticks) by color and place each color of candy into a separate small resealable plastic baggie.
- Bash the candy inside the bag with a rolling pin to crush into small pieces.
- Roll out your cookie dough to an 1/8 inch thickness.
- Using a large cookie cutter, cut out shapes from the dough.
- Transfer cookie dough shapes onto ungreased FOIL lined cookie sheets using a rubber spatula.
- Take a smaller cookie cutter and cut out another shape in the center of each cookie shape.
- For example, use a large leaf shape, then a smaller leaf shape cutter to cut out the center.
- The shapes don't have to match but one needs to be smaller than the other.
- You may also use a knife to cut out holes in the centers instead.
- Fill the holes made in each cookie shape with the crushed candy pieces.
- Bake in a preheated 350 F oven for about 10 minutes, or until cookies are baked and candies have melted to form stained glass candy centers.
- Allow to cool completely before removing from the cookie sheet.
Questions & Replies

Got a question?
Share it with the community!
Reviews
-
This is hands-down the easiest way I know of to make decorated cookies. My 14 year old daughter joined in on the fun here. She had a great time choosing the lifesaver flavors and bashing them into pieces. The best shapes for us was the gingerbread boy shapes. We used a plastic drinking straw to cut out the "eyes", then gave the gingerbread boy a decorated belly (holly leaf shape, star, bell, etc.) It was great fun choosing which candy colors to use. I think that next time we'll will try this decorating method with a gingerbread-flavored cookie dough. Thanks, HeatherFeather for submitting this awesome recipe, and for creating a new holiday tradition in this house!
-
 I must agree. Such a simple way to make a very sharp looking cookie. And depending on what shapes you use, you can make them look very wimsical or very elegant. I was making butter cookies and just used my regular recipe. Make sure you save the shape out of the middle of the cookie, that's a cookie too! Don't throw them away.
 -
 What fun!! I used Recipe #106361 for my cookie dough and cherry (red) & watermelon (pink) Jolly Ranchers for the candy. The red definitely worked better because it was a better contrast with the cookie. I read on a blog to roll out, cut out and fill the cookies on parchment paper cut to the size of your cookie sheet. Then you could just lift the whole piece of parchment to put them on and remove them from the cookie sheet. It worked like a dream!!! UPDATE: Don't use Jolly Ranchers! They make the cookies very difficult to eat because they are so "sticky" when you chew. Next time I will definitely go with LifeSavers or lollipops!