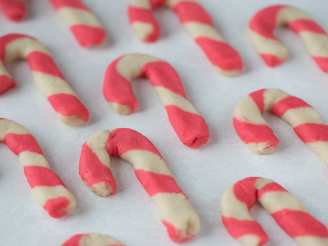
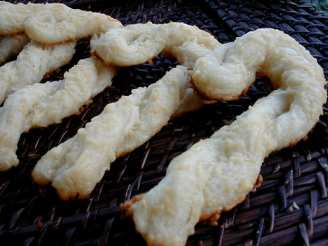
Real Candy Canes

- Ready In:
- 40mins
- Ingredients:
- 5
- Yields:
-
20 pieces
ingredients
- 2 1⁄2 cups granulated sugar
- 9 tablespoons water
- 1 1⁄2 tablespoons white vinegar
- 1 1 teaspoon wintergreen extract or 1 teaspoon anise flavoring
- 1⁄2 1/2 teaspoon green food coloring or 1/2 teaspoon white food coloring
directions
- Preheat the oven to 200 degrees Fahrenheit.
- Place a cookie sheet with a small silpat on the top rack inside the oven.
- For two or more colors, stagger the cookery by 15 or 20 minutes to make the process of forming the sugar syrup into a workable mass easier.
- In a two-quart non-reactive saucepan, stir together the sugar, water, and vinegar.
- Place the saucepan over medium high heat and insert a candy thermometer.
- Bring the sugar syrup to 320 degrees Fahrenheit.
- It will be necessary to keep the inside of the saucepan clean while the sugar melts and cooks.
- To do this, dip a clean pastry brush in cold water, then brush the inside of the pot just over the syrup line to keep crystals from forming.
- When the syrup is a couple of degrees from the desired temperature, carefully add the flavoring.
- Immediately transfer the syrup to a silpat pastry mat by pouring slowly onto the surface.
- Add the food color to the syrup and swirl with a wooden skewer to blend it into the sugar syrup.
- Do this very carefully and do not touch the syrup.
- It will remain VERY hot for quite some time.
- To keep the syrup from running off the mat as it begins to cool, gently lift the mat from the sides to keep the syrup contained.
- As the syrup cools, it will become malleable along the sides.
- As it does this and using the silpat mat as a tool, fold the syrup onto itself toward the center of the pool.
- Continue to do this until a soft mound results.
- When the hardened syrup can be handled, gently knead and pull the sugar until it becomes glossy.
- This will also incorporate the color throughout the mass.
- Transfer the soft candy to the oven to keep it warm.
- Keep an eye on it and keep rotating the sugar and the tray to keep the temperature consistent.
- For the second color, repeat the process as above after the first 15 minutes of cookery.
- Place the two or more colors enough apart so they do not touch each other.
- To make a candy cane, carefully pull a small amount from each color, about an ounce, and cut with a scissors.
- Form each color into a one-inch by three-inch rectangle.
- Place each piece on top of each other.
- Working on another silpat mat on another sheet tray placed over the open oven door, roll the sugar until it is round and apply a small amount of pressure while doing this.
- It is important to keep the sugar warm and slightly soft while you do this.
- Gently twist and pull the sugar to begin the candy cane then continue to roll in the same manner.
- Repeat this process until the candy "rope" is eight to ten inches long.
- Carefully transfer the rope to another silpat on a work surface.
- Shape one end of the rope to finish the candy cane.
- Let cool up to 30 minutes.
- This can also be done on a lightly butter smooth marble or stone surface.
- Repeat procedure for each candy cane.
- It is important to maintain the warm and soft texture of the sugar at all times when making the candy canes.
- This will take some practice both with the process of making the candy canes and finding the best way to keep the heat consistent.
- When the candy canes are hardened, they can be held up to three days if kept in an airtight container.
- Parchment or wax paper works well once cooled and ready for storage in the containers.
Questions & Replies
Got a question?
Share it with the community!
Reviews
Have any thoughts about this recipe?
Share it with the community!
RECIPE SUBMITTED BY
Paulcm
United States


