Community Pick
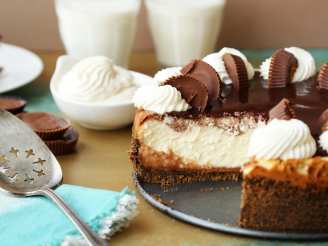
Ruggles Reese's Peanut Butter Cup Cheesecake

"This was a best selling dessert for Ruggles Grill, in Houston. It's a little different than some peanut butter cheesecakes--very good---with that winning combo, chocolate and peanut butter! Hope you enjoy."
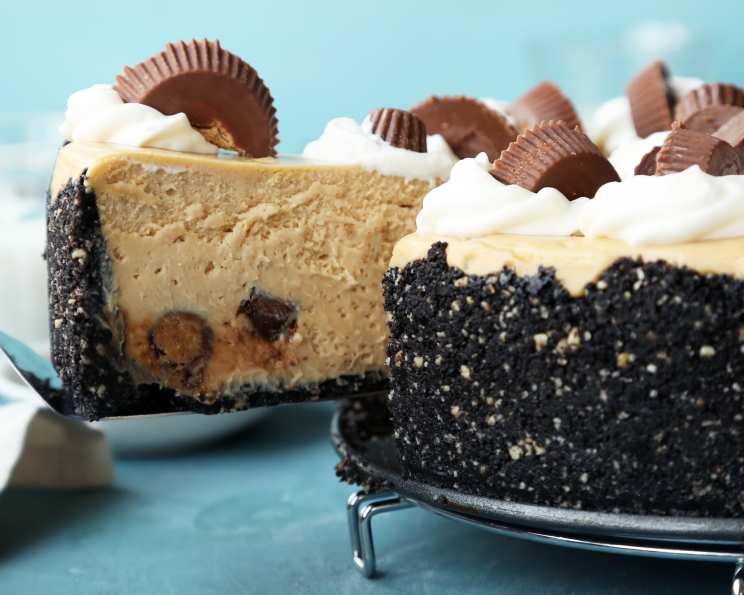
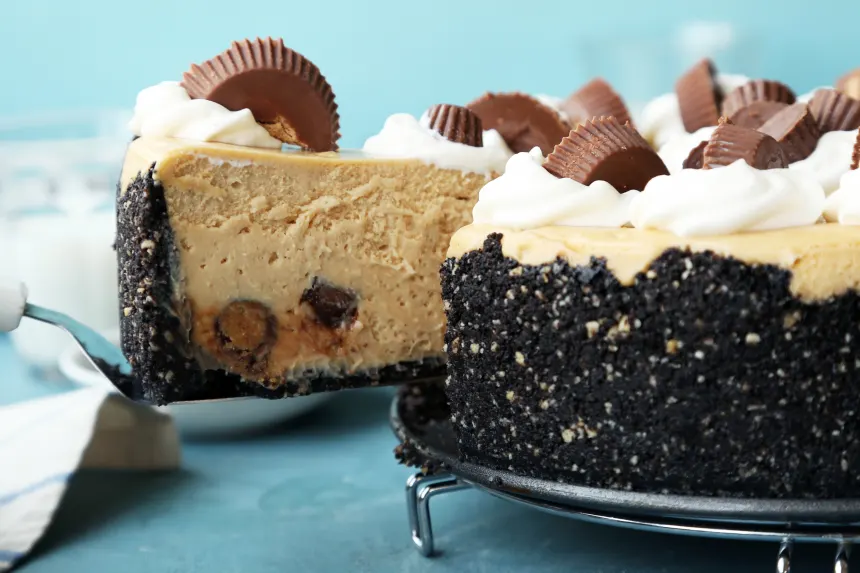
photo by Jonathan Melendez


- Ready In:
- 2hrs 15mins
- Ingredients:
- 12
- Serves:
-
10
ingredients
-
For The Crust
- 4 1⁄2 cups crushed Oreo cookies
- 1 cup chopped roasted peanuts
- 1⁄2 cup butter, melted
-
For The Filling
- 2 lbs cream cheese, softened
- 5 eggs, at room temperature
- 1 1⁄2 cups firmly packed brown sugar
- 1 cup smooth peanut butter (not natural-style)
- 1⁄2 cup whipping cream
- 1 teaspoon vanilla extract
- 12 Reese's Peanut Butter cups, broken into small pieces
-
For The Topping
- 3 ounces sour cream
- 1⁄2 cup sugar
directions
- Please Note****Plan ahead--cheesecake needs to chill for at least 4 hours.
-
To Make The Crust:
- Combine crushed Oreo cookies and peanuts that have been ground in a food processor with the melted butter.
- Pat the crust mixture onto bottom and sides of a 10-inch springform pan.
-
To Make The Filling:
- Beat cream cheese in bowl of electric mixer until smooth.
- Add eggs, one at a time, beating well after each addition.
- Add sugar, peanut butter and cream; mix until smooth.
- Stir in vanilla, then fold in peanut butter cup pieces with a rubber spatula.
- Pour filling into prepared crust.
- Place springform pan into a larger baking pan.
- Pour hot water into the larger pan so that the water comes 1 inch up the sides of the springform pan.
- Bake at 275°F 1-1/2 hours, or until firm and lightly browned.
-
For The Topping:
- Combine the sour cream and sugar and spread on the cheesecake.
- Return the cake to the oven for 5 minutes.
- Remove from the oven and allow to cool on a wire rack for one hour.
- You may run a knife along the edge of the cake to loosen it from the pan somewhat.
- Refrigerate for at least 4 hours.
Questions & Replies

-
 Do the bottom and/or sides of the springform pan need to be greased or lined with wax paper?
 -
 Is there a conversion for a 9-inch springform pan? (If not I'll go get a 10-inch) Really excited to try your recipe!
 -
Does anyone have any idea for a different icing. Cannot use sour cream
-
This might be a stupid question-here goes-do you leave the cream in the Oreo's or just use the chocolate cookie?
-
Can this be frozen?? I would love to make it a week or two in advance so I’m not so stressed out for the holidays!! I hate having to do everything in 2 days.
see 3 more questions
Reviews
-
 I made this for the "alternative" Thanksgiving dessert selection , for those craving something beyond the expected. To say it went over well is an understatement. One person that managed to put in a bid for a slice the Sunday following just sat there and sorta moaned while eating. Upon inquiry with our normally rather formal and gracious guest, she stated she was great and having a "cheesecake orgasm." Very difficult to reply to your guest when they say that, lol. A couple of points about preparing this, one, I used honey roasted peanuts in the crust. I found the peanut butter cups were best not cut too small but leaving some chunks worked well, about 1/8 of a full size cup or 1/4 of a mini. Adding the brown sugar is a bit of an issue though, as it tends to have small lumps or forms them when you blend it in. It is important you do not overmix the cheesecake batter, so as not to incorporate too much air, which could result in a nasty and unattractive crack in the cake. Next time I think I will blend the peanut butter, cream and brown sugar together seperately, and then add to the cheese mixture. Allow the batter to sit in it's mixing bowl for a few minutes and then sharply rap it against a counter to release some of those trapped air bubbles, which helps prevent cracking issues later. Once added to the pan, lightly shake and tap the pan to help release any last bubbles, but use care to not disturb the crust with rough handling. I am rather paranoid that water from the Bain Marie will seep into springform pans, so what I do is wrap the pan in several overlapping layers of aluminum foil and then place in a very heavy plastic bag, such as the heavy duty duty ones you get at some grocery stores, securing it to the side of the pan with a bit of handy duct tape. Don't worry, the bag will not burn nor melt at this baking temp, comes out good as new, scary thought, lol. When adding the hot water to the Bain Marie, try using very hot water that is nearly boiling, as this will help speed things along a bit, as I encountered a very prolonged cooking time with just hot tap water. Don't open the oven at all until it is truly getting close to the minimum baking time, as opening the oven provokes those dreaded cracks and slows down the baking as well. Allow for just a slight jiggle in the very center of the cake to let you know it's done with baking. Make at least a quantity and a half of the sour cream topping to make sure the top is smooth and evenly covered. Once the sour cream topping has set, DON'T REMOVE THE CHEESECAKE FROM THE OVEN. Turn off the oven and prop the oven door open slightly and leave it in there for at least an hour to allow it to very slowly cool down. Remove from oven and very gently loosen the crust from the side of the pan with a long and thin knife blade, using care not to disturb it too much. Doing this helps the crust to pull away from the pan as the cake contracts in cooling, putting less stress on the cheesecake, lessening the chance of a crack developing. Allow to cool thoroughly on a rack and then refrigerate, preferably wrapped in a kitchen towel to insulate it, so that it chills slowly. Feel free to make your cheesecake a couple of days ahead, it really does improve with a little age. When slicing your cheesecake, using a thin blade that you clean with a cool, wet towel in between EVERY slice, leaving a little moisture on the blade. This method gives you a cleaner slice of this almost heaven. I guilded the lily and plated this with homemade caramel and ganache sauces, along with some pb cup pieces and chopped honey roasted peanuts. All this sounds complicated, but in reality it takes very little actual active work, it's all pretty easy in the end and will convince people you are the Queen of Cheesecake. Btw, if you are just not able to go through the anti-crack steps, don't worry, heck with it, it will still taste awesome, even if a crack does develop. If this happens, just strategically cover any oops with pb cups, nuts and sauces, likely no one will notice and definitely won't care after they wrap their mouth around this lucious little number. Thank You Peggy for sharing :)
 -
 This cheesecake turned out beautifully! I didn't have a deep enough pan to do a true water bath (the water only came up about 3/4" on the side), so I baked it until the internal temp was 160 degrees. It was gorgeous! No cracks or unsightly browning. We easily got 20 slices from this cheesecake. My husband said it was better than the peanut butter cheesecake he always gets at The Cheesecake Factory! I love how it looks like a restaurant cheesecake. Thanks for this delicious recipe!<br/>What I did: I read that it is best not to over beat the batter after the eggs are added, so I added the eggs last - just before stirring in the peanut butter cup pieces. Also, I opted for a hot fudge drizzle instead of the sour cream topping. Once cheesecake reached internal temp of 160 degrees, I removed it from the water bath and placed it on the stovetop burner to cool. I read to invert a plate over the top of the cheesecake to trap in moisture and slow down the cooling process as that is supposed to help prevent cracking. I let it cool for 4 hours at room temp, and then overnight in the fridge. I did loosen the crust from edge of pan before putting it in the fridge, and before removing the pan. I also put parchment paper (cut to fit pan) in the bottom to aid in removal from bottom of springform pan. Some wrote that they had too much oreo crumbs for the crust . . . I loved the large quantity of crust ingredients. It allowed me to extend the crumbs all of the way up the side of the pan. Beautiful!
 -
I created a food.com profile just so I could review this recipe. That is how good this cheesecake is. It is amazing, decadent, delicious. Think of the most delicious food adjectives available, and the apply them at your will to this recipe. Sooooo good. I made the cheesecake exactly according to the recipe's ingedients, and it turned out perfectly. If I make it again, I will probably chop up fewer oreos because I found that after patting in the crust for my 10-inch cheesecake, I still had about 3/4 cup of leftover oreo crumbs. Also, like others, I had to bake the cheesecake for a longer period of time--closer to 2 hours--to make sure that it set correctly. After 2 hours, the middle was still a little jiggly and it looked perfect. I thought the topping listed looked so-so, so I decided against that. Instead, I spead some room-temperature store-bought hot fudge topping over the top, then topped that with about 8 chopped up reese's PB cups. I also sprinkled some chopped peanuts on the top. Then, to finish, I heated up some additional hot fudge in the microwave and drizzled it over the top and down the sides. Doing all this was an extra step, but I made this cheesecake for the holidays so it turned out looking really festive and beautiful. My husband thought he died and went to heaven. Just a quick note: Do NOT attempt to make this cheesecake in a 9-inch pan. You really need a 10-inch, or the 9-inch will overflow because there will be too much batter. Enjoy!
-
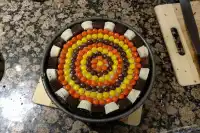
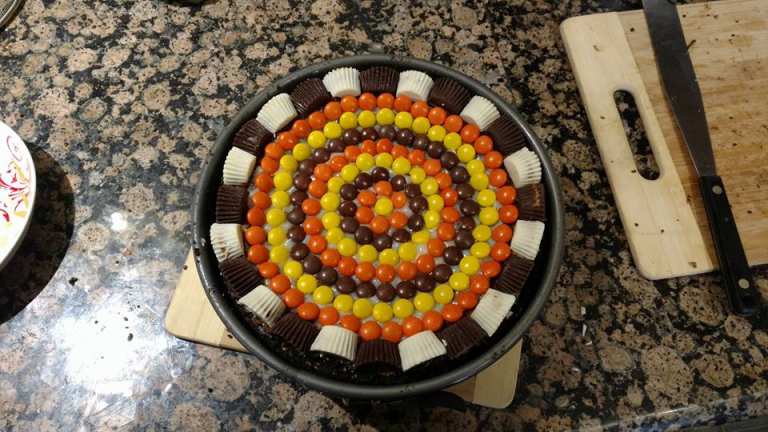
Everything was great, but I had to cook at 325 for 1 1/2-2hrs until knife inserted in middle of cake came out clean. I used mini Reese's cut in half for the border and Reese's pieces for the middle.
-
-
My oldest daughter selected this cake for me to make for her 23rd birthday. When I saw a picture of the cake I must admit I was intimidated. I examined the recipe and was up for the challenge. I'd never heard of it before and was, intrigued. So I put it together, after watching a chef make it on youtube just to get some tips. I'm glad I checked out the video, his suggestion was to sprinkle the chopped peanutbutter cups half way through the pouring. I nervously waited for the next day to roll around for the cutting to serve to my Christmas Baby (one of 2). It sliced like a dream and tasted heavenly. I was not at all disappointed it the result. Who cares that 4 1/2 cups cookie crumbs is too much for the crust. The cake is OMG!!
see 82 more reviews
Tweaks
-
I added a chocolate ganache on top. Otherwise I followed the directions to a T!
-
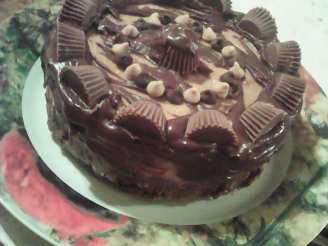
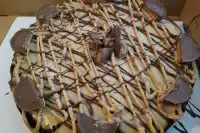
This recipe is sooooo yummy! I skipped the sour cream topping and added a drizzle of chocolate and chopped up Reese's on top instead. You can see my photo, it says Willbmd. It took me about 2 hours in my oven instead. I removed it from the oven and wrapped the pan in semi-cold wet towels and then covered the cake with another dry towel. Let it rest 1 hour - no cracks. This prevents the sudden temp change but also doesn't keep it cooking like other methods of leaving it in the oven.
-
Are you selling ingredients here?
-
 Milk Chocolate Hobnobs and Salted caramel honey roasted peanuts. I also added half a cup of peanut butter and reduced the sugar due to the sweetness of the peanut butter cups.
 -
Turned out very well, but for the topping since I really hate sour cream I used the rest of my whipping cream and made Nutella Whipped Cream to top along with some extra Reese cup pieces.
see 3 more tweaks