Serviette/Napkin Folding, the Shirt Fold.

"My interest in serviette folding was born on a wet day at my Grandmother's house, I was a pre teen and helping her with the ironing and watched while she ironed serviettes into wonderful shapes and neatly stacked them for use. I asked her to show me how and she did. Once you know several folds and people see them, they often have at least one other that you haven't seen before, you gain knowledge of the new one and on it goes. Now that I have already posted all the napkin folds I know, I decided to look on the net for some new ones to learn. This one was called the Shirt Fold and is a real novelty serviette.. yes, it's intricate but not that hard, I've made a lot of step-by-step photos to guide you though. Ironing this serviette at each step will make the world of difference ! This one is so much fun and I can see it in pink or blue at kids parties with a 3 or 4 sweets down the front as buttons, or flowers for grownups, or even a paper cutout baby for a baby shower... let your imagination run riot with this one !"
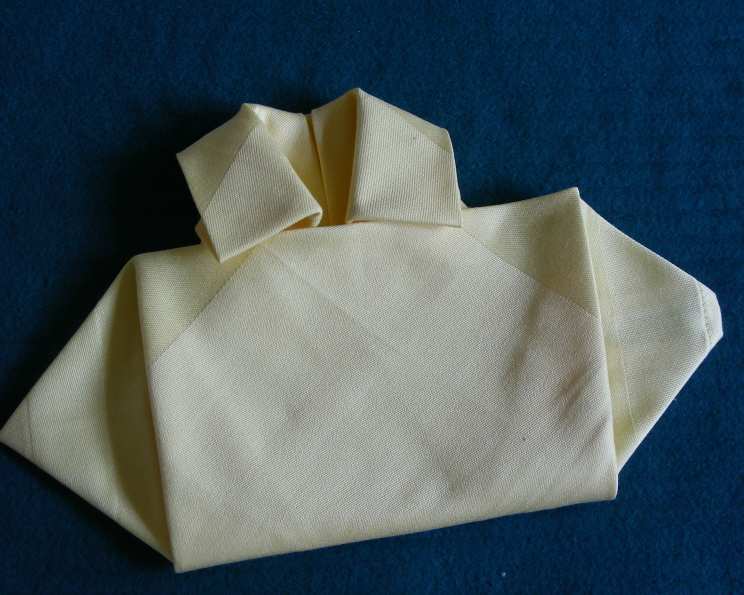
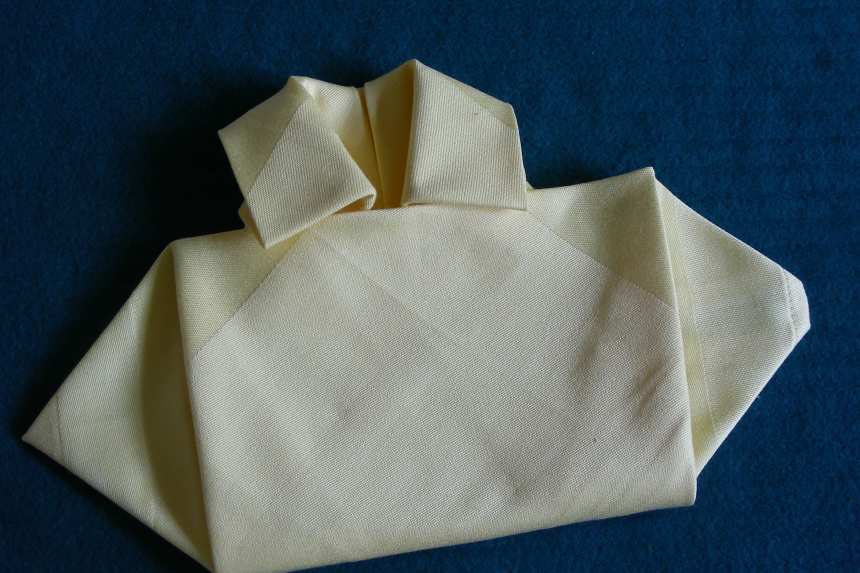
photo by kiwidutch


- Ready In:
- 4mins
- Ingredients:
- 2
- Serves:
-
2
ingredients
- 1 paper, serviette (large)
- 1 cloth, serviette (large)
directions
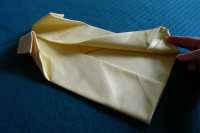
- Lay your serviette square out flat before you in a square shape.
- Take the top right corner and fold the point into the center point of the square. Repeat with the other 3 corners. You should have a diamond shape in front of you.
- Take the diamond and position it so that it is now a square in front of you. Then take the right top and bottom side corners and fold them vertically in towards the center of the serviette so that you have a shape before you that has a wide rectangle on the left side and a thinner rectangle on the right.
- Now bring the top and bottom left corners in to the middle center so that you have two even vertical rectangles before you.
- Carefully turn the serviette over.
- Fold the top inch (2.5cm) (or slightly less, if you are not using a big serviette) towards you and iron it firmly. This will be your shirt collar. Then gently turn the napkin over again.
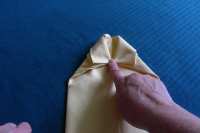
- Bring the top right corner in to the top center of the serviette, but place it about 1/2 inch (15mm) down the centre line like the centre of a collar.
- Now take the right bottom flap and fold them up and out diagonally, the upside down "V" in the centre will semi mirror the angle in the coller folds above it. Repeat with the left bottom flap. You should have before you the piece with the collar at the top and some angled triangles at the bottom that will shortly be the sleeves of the shirt.
- Take the bottom left and right corners (these are also the bottom points of the triangles that stick out) and fold them upwards until the middle of the line between them is level with the center of the collar at the top. You will now have a square shape in the middle with the collar above it and two "sleeves"at either side. Fold the centre top of the square under the flaps of the collar so that it looks like a real shirt.
- Decorate with flowers or sweets etc for buttons if desired.
Questions & Replies

Got a question?
Share it with the community!
Reviews
Have any thoughts about this recipe?
Share it with the community!
RECIPE SUBMITTED BY

kiwidutch
Netherlands


