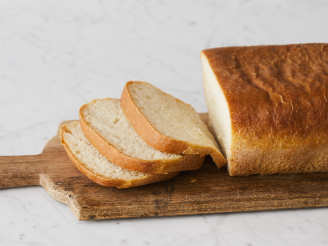
Sourdough (Wild Yeast) Bread

"Sourdough is believed to have originated in Ancient Egyptian times around 1500 BC, and was likely the first form of leavening available to bakers.
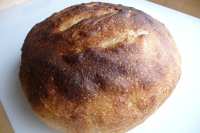
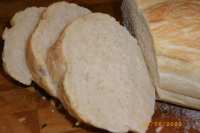
This is definitely a labor of love, but the end result is the most amazing bread! Because of the complex three build process, this recipe probably is not the best choice for the first time bread baker. Besides basic sourdough bread, there are so many possibilities. Just to give you some ideas, check out the Optional Additions; let your imagination be your guide; walnuts and blue cheese together is amazing! It takes a little time and attention, but your efforts will definitely be rewarded. Please read the instructions thoroughly before starting. Note that the special equipment needed is a baking stone, steam pan (see *note at bottom) and spray bottle. This recipe is from Peter Reinhart's book The Bread Baker's Apprentice. If you want to raise your level of bread baking, this is the book you need! PIctured to the left is a loaf where walnuts and blue cheese were added."

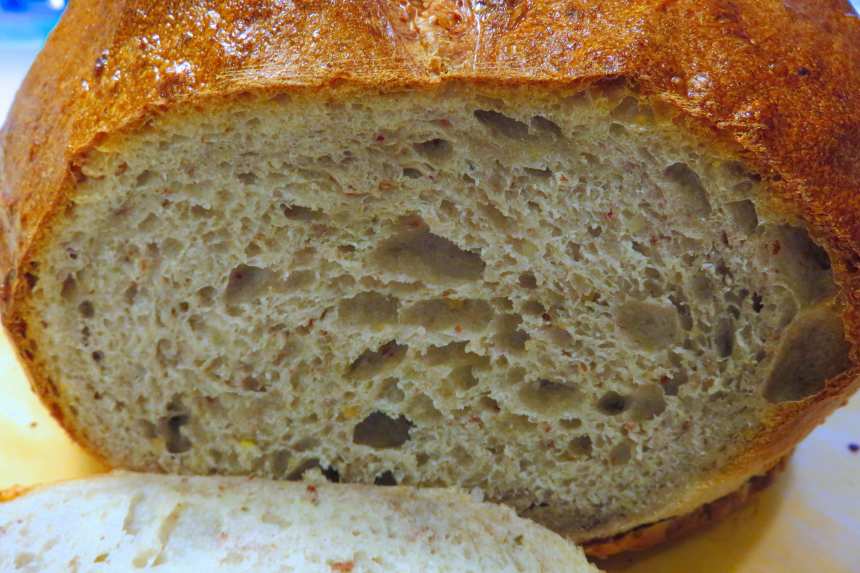
photo by Bonnie G #2


- Ready In:
- 48hrs 45mins
- Ingredients:
- 9
- Yields:
-
2 loaves
ingredients
-
FIRM STARTER
- 2⁄3 cup sourdough starter (4.0 oz.)
- 1 cup bread flour (4.5 oz)
- 1⁄8 - 1⁄4 cup water
-
FINAL DOUGH
- 4 1⁄2 cups bread flour (20.5 oz., or wheat or rye flour, weight will vary)
- 2 teaspoons salt
- 1 1⁄2 - 1 3⁄4 cups water, lukewarm
-
Optional Additions
- 1 cup roasted garlic
- 1 cup walnuts, pecans, sun flower seeds
- 1 cup cheese (Blue, Parmesan, Feta)
directions
- DAY ONE: You will need 2/3 cups of active starter so refresh your starter with 2/3 cup flour and 2/3 cup bottled water. Cover and allow to ferment for 6-8 hours. Once the starter has been refreshed you can continue with the recipe, or refrigerate the bowl over night.
-
MAKE FIRM STARTER:
- If you have refrigerated the starter, remove it from the refrigerator and measure out 2/3 cups and place in a small bowl, cover with towel or plastic wrap and allow to warm up for one hour. If the starter is room termperatue then continue as noted below.
- Add one cup flour to the bowl; add the starter and mix together, adding only enough additional water so that you can knead this into a small ball. Should be about the texture of french bread dough. No need to work very long, just be sure that the flour is hydrated and the starter is evenly distributed.
- Place dough in small bowl sprayed with non-stick cooking oi, turn dough once and cover with plastic; allow to rise until doubled in size, approximately 4 hours.
- Place in the refrigerator overnight.
-
NEXT DAY:
- Remove the firm starter from the refrigerator and cut into about 10 small pieces with a pastry scraper. Mist with non-stick spray, cover with a towel or plastic wrap and let sit for 1 hour to take off the chill from the dough.
- To a large mixing bowel stir together the flour and salt.
- With a large spoon, stir in the starter pieces and enough water to bring everything together into a ball.
- Hand Kneading: Sprinkle counter lightly with flour and knead for 12 to 15 minutes.
- Kitchen Aid Mixer: Sprinkle dough lightly and knead with DOUGH HOOK for 4 minutes on medium-low speed; allow dough to rest for 5-10 minutes, and then mix for another 4 minutes.
- Additions such as garlic, nuts or cheese, should be added during the last two minutes of mixing.
- With both methods, adjust the flour and water as needed. The dough should be firm but tacky, like firm French bread dough. The temperature of the bread dough should be between 77º and 81º F.
- Lightly oil a large bowl and transfer the dough to the bowl, rolling around to coat with oil.
- Cover the bowl with plastic wrap and allow to ferment at room temperature for 3 to 4 hours, or until dough has doubled in size.
- Gently remove the dough from the bowl and divide into 2 equal parts (approximately 22 oz. each), being careful not to degas the dough.
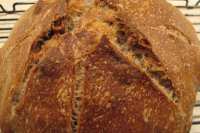
- Gently shape dough into a boule, baguette, batard or rolls.
- Proof the dough in bannetons or proofing bowls, or on parchment-lined sheet pans that have been dusted with semolina flour or cornmeal.
- Mist the exposed part of the dough with spray oil and loosely cover the dough with a towel or plastic wrap.
- At this point you can either proof the loaves until doubles (2 to 3 hours), or retard overnight in the refrigerator. Or you may wish to do as I do, bake one now and retard the other for tomorrow.
- If retarding, remove them from the refrigerator approximately 4 hours before you plan to bake them.
-
BAKING:
- Place baking stone on middle shelf.
- Place oven-proof skillet or broiler pan in bottom of oven to use as a steam pan. (*I use a cast iron skillet,but a broiler pan will work just fine.).
- Preheat oven 500º F.
- Ten minutes before baking remove plastic covers.
- Carefully move dough to peel dusted with cornmeal or semolina flour.
- Score the top of the dough.
- Slide the dough onto preheat baking stone.
- Pour 1 cup hot water into the steam pan and close the door.
- After 30 seconds spray the oven walls with water and close the door (careful not to spray glass window).
- Repeat twice more at 30 second intervals.
- After the final spray reduce the temperature to 450º F and bake for 20-30 minutes or until the loaves are done.
- The centers should register 200º in the center on an instant read thermometer.
- When done they will be a rich golden brown and sound hollow when thumped on the bottom.
- Remove from oven and transfer to wire rack and cool for 45 minutes before slicing.
Questions & Replies

-
 Hey Galley, I’ve been a Sous Chef for 25 years in various fine dining rooms from Sedona-L.A-Las Vegas-Depoe Bay. I will become a bakers apprentice next week and have a novice knowledge thus far when it comes to this new world for me. When you refer to a sour dough starter, my mind visualizes a little brown stout jar labeled,”Blue ribbon yeast”. I know that in not what you are referring to, so how and where can I make or purchase my own starter? Please point me in the right direction. Thanks
Reviews
-
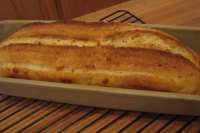
 GW, this was the longest it has ever taken me to make a sourdough loaf, but it was worth going through all the stages to get the end result it was magnificent. The first one I baked right away and I baked it in my tontopf clay baker with the lid on and took the lid off for the last ten mins, got not a bad result, but the next day I baked the second one just in a tin pie dish, I had risen it in a bowl lined with parchment paper and just lifted it in when the oven was ready and I had the steam tin in the bottom, also spayed the oven walls as your instructions said and I think this was the best method I got a better loaf it's a bit darker than the first one but I prefer it like that, and a better rise. We had it with thick butter just how we like it with a nice cuppa. Absolutly delicious worth every second of the time and effort. Thank you for posting, I do like my bread and would give this ten if I could.
 -
Oh GW; thanks so very much for posting as well as all the help you provided (including the wild yeast starter) through this process. When I first looked at the directions I thought "NO WAY" but discovered most of it was just very complete directions. I made and served this for a company dinner of smoked ham, asparagus, recipe#18148 and recipe#239960 and it was perfect. Once of the best breads I've ever made. I chose not to use any of the optional ingrediants and the taste of the bread it self shown like a star at the meal with a wonderful crunchy crust and soft, light and airy inside. This made one very large baguette and two smaller ones that I froze for later use. No one should be intimated by the long list of steps as they are just very complete - but DO follow your advise and read through them first AND plan ahead as it's a several day process. This recipe not only deserves 5 stars but a GOLD STAR Edited to add: The steam pan (I used the broiler pan) is a must along with the spray bottle for that great crust. I used my pizza stone to sit the bread on and it worked perfect.
-
 I bake sourdough bread all the time useing my own captured wild yeast this recipe looks like alot of steps but really it's not that bad. The process really goes by pretty fast,<br/>Bread has a nice soft crust and a chewy crumb. Great for sandwiches or garlic bread, and makes tasty toast also. I highly recommend this recipe. Thank you for shareing it with me. It's in my recipe book.<br/>popeyebud
RECIPE SUBMITTED BY

Galley Wench
Oro Valley, Arizona
"Life is not a journey to the grave with the intention of arriving safely in a pretty and well preserved body, but rather to skid in broadside . . . Chardonnay in one hand . . .chocolate in the other; the body thoroughly used up, totally worn out and screaming "WOO-HOO, what a ride!!"