Sweet Potato Skins- Texmex Style

"I love potato skins! I've had them is many ways, but I've seen very few recipes that put taco fillings on them. For this recipe I went one step farther and used sweet potatoes. The heat in the chile powder is a great match for the sweetness of the potato. For the taco meat, I've called for extra lean ground beef and a (partial) packet of taco seasoning; but I would suggest using leftover taco meat from another meal, since so little is called for. Also, don't feel you have to use beef- any ground meat or meat sub with your favorite taco seasoning will work here. These would be great to serve as finger food during the big game, either instead of, or along side nachos. I went pretty basic when I made them, but you can load them up with whatever toppings float your boat! I've included the time to bake the sweet potatoes, but you can put this together this very quickly if you bake the potatoes and make the taco meat ahead."
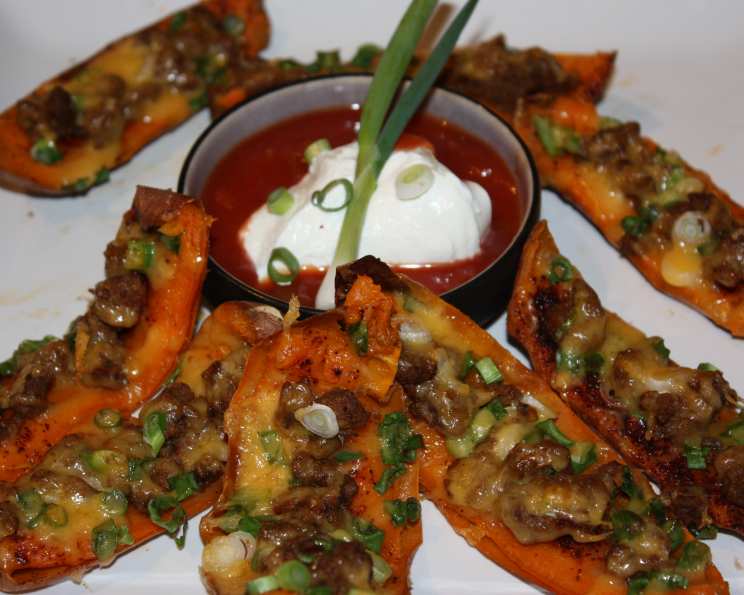
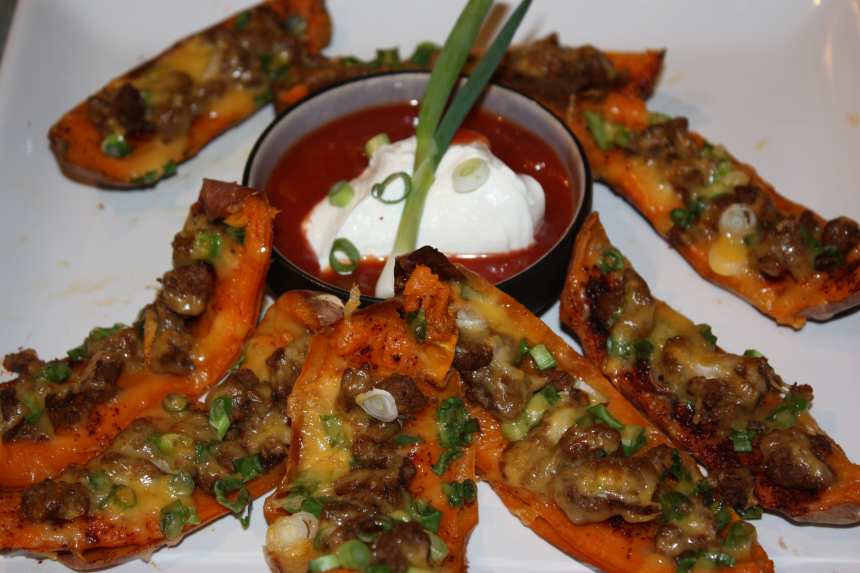
photo by IngridH

- Ready In:
- 1hr
- Ingredients:
- 12
- Serves:
-
2
ingredients
- 2 small sweet potatoes, baked
- 1⁄4 lb extra lean ground beef
- 0.25 (1 1/4 ounce) envelope taco seasoning mix (I use Mucho Gusto Taco Seasoning Mix instead of store bought)
- 1⁄2 teaspoon kosher salt
- 1⁄2 teaspoon chili powder
- 2 ounces shredded sharp cheddar cheese (use more if you like) or 2 ounces shredded monterey jack pepper cheese
- 2 scallions, chopped
- sour cream, to garnish
- salsa, to garnish
- sliced jalapeno, to garnish
- black olives, sliced to garnish
- chopped tomato, to garnish
directions
- Bake the sweet potatoes at 400F for 40 minutes, or until done. Set aside until cool enough to handle.
- In a small skillet, brown the ground beef. Skim off any accumulated fat, and add taco seasoning, plus any liquid called for in the recipe. Simmer gently until liquid is almost gone. It's very important to skim as much fat as possible, to avoid a slimy texture.
- Set the oven for broil, and allow to preheat as you complete the assembly.
- Once the potatoes are cool, slice in half lengthwise, and scoop out most of the potato inside. Leave 1/8 to 1/4 inch of flesh, so that the skins don't fall apart when you pick them up.
- Place the potato shells on a baking sheet covered with foil, or sprayed with cooking spray so they don't stick.
- Sprinkle the potato shells with salt and chili powder. The amounts I've given are estimates, use more or less according to your taste.
- Top each shell with taco meat, green onion, and cheese.
- Broil until the cheese is melted, and the skins are heated through, about 5-8 minutes.
- Serve immediately with the garnishes of your choice.
Questions & Replies

Got a question?
Share it with the community!
Reviews
Have any thoughts about this recipe?
Share it with the community!
RECIPE SUBMITTED BY

I live near Seattle, WA with my husband of 11 years and our pet ferrets.
We're lucky enough to own a home with a big, south facing yard which is great for entertaining. It also allows me to have a big vegetable garden where I grow most of my own herbs and a lot of the vegetables we eat in the summer, as well as a bunch to share with family and friends.
In my professional life, I'm an accountant- but what I really love to do is cook and eat! Most of my ability is self-taught. I love to experiment with new recipes and techniques, most of which I get from watching way too much food tv and reading foodie magazines.
Recently I decided to start a personal chef business and have cooked for a few clients. I love the challenge of designing a menu to fit a family's specific tastes and needs, and then cooking it for them to enjoy.
For me, cooking is an expression of love. Everyone needs to eat, but food is more than just fuel for the body, it can nurture and comfort ~ give us a memory from childhood, or a retreat when we feel ill. I always think of the people who I'm cooking for when I make a dish, and there is no better compliment than when someone enjoys the food I've made especially for them.
I also like to do OAMC- style cooking, but instead of using it mainly to get dinner on the table, I focus on getting lunch in the bag! Eating out is far too expensive in both dollars and nutrition to make a habit of, yet I want a hot, satisfying meal to enjoy in the middle of the day. Cookin ahead allows me to have great food, without sacrificing either my dollars or my waistline.
<img src="http://i80.photobucket.com/albums/j166/ZaarNicksMom/Animation6.gif"><img src="http://i80.photobucket.com/albums/j166/ZaarNicksMom/PACsticker-Adopted.jpg">
<img src="http://i23.photobucket.com/albums/b399/susied214/permanent%20collection/participantbannerzwt5.jpg" border="0" alt="Photobucket">
<img src="http://i250.photobucket.com/albums/gg271/MrsTeny/Permanent%20Collection/PACSpring09Participation.jpg"><img src="http://i250.photobucket.com/albums/gg271/MrsTeny/Permanent%20Collection/PACSpring09Iwasadopted.jpg"><img src="http://i23.photobucket.com/albums/b399/susied214/permanent%20collection/PACfall08partic.jpg" border="0" alt="Photobucket">
<img src="http://i23.photobucket.com/albums/b399/susied214/permanent%20collection/IWasAdoptedfall08.jpg" border="0" alt="Photobucket">
<img src="http://i250.photobucket.com/albums/gg271/MrsTeny/AMpageSticker.jpg" border="0" alt="Photobucket">
<img src="http://i147.photobucket.com/albums/r317/j_welcome/pics2/food/PRMRcopy.jpg"><img src="http://i270.photobucket.com/albums/jj81/HokiesLady65/Recipezaar%20Album/iplaytagin.jpg">[IMG]
http://i37.photobucket.com/albums/e95/momaphet/Food/banner10.jpg[/IMG]


