
How to Make a Pumpkin Keg
Turn a simple pumpkin into an impressive drink dispenser for your Halloween party.

Planning a fun Halloween or fall party? Why not add an awesome pumpkin keg to your food and beverage spread? Making a pumpkin keg is as simple as carving a jack-o-lantern (actually, it’s easier!) and will add lots of festive character to your Halloween party. Fill your pumpkin with your favorite fall brew, party punch or Butterbeer!
Here are the easy steps to creating a show-stopping fall keg:
1 Choose a Pumpkin, buy a spigot and Outline
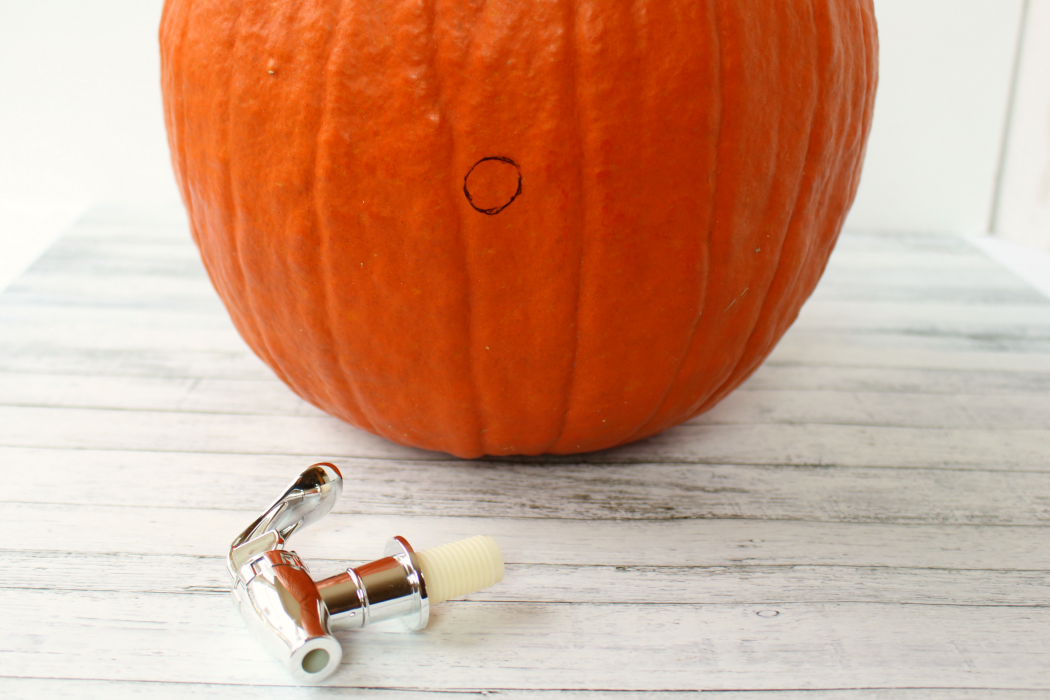
The first step in creating a pumpkin keg is to choose a rather round, uniform pumpkin. Make sure it can sit evenly without tipping to one side or another. Before you start, rinse off any excess dirt and dry well with paper towels.
With a pen or fine tip marker, outline the top where you will be cutting your lid. You’ll also want to gauge where you will be putting the spigot. Avoid putting your spigot too low, as you’ll have a hard time getting the glasses and cups under the spigot for pouring. Find an even spot about halfway up the side of the pumpkin and outline around the end of the spigot.
2 Cut the Top and Empty the Seeds and Pulp
Much like carving a jack-o-lantern, cut a round hole in the top of the pumpkin near the stem. Scoop out all of the seeds and pulp and scrape down the internal sides. Scrape the area near the outline of the spigot hole outline a little extra – you’ll need this area to be even and free of seeds and stringy pulp.
3 Cut out the Spigot Hole and Insert Spigot
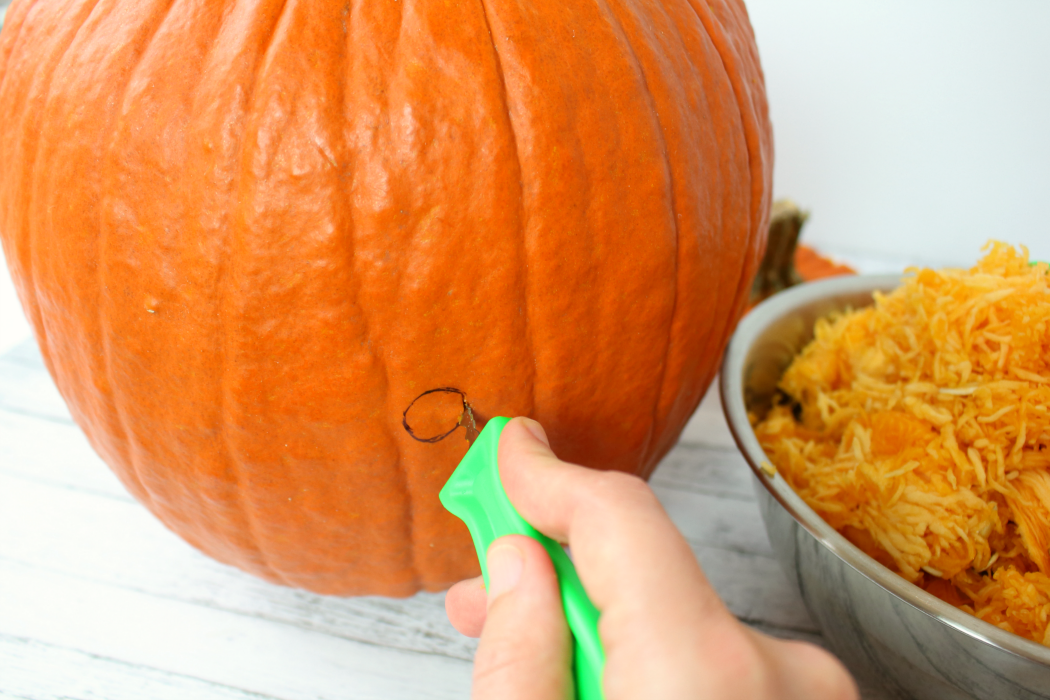
Using the outline you previously traced as your guide, carefully cut out the spigot hole. Cut on the inside of the outline to help avoid liquid leakage down the line.
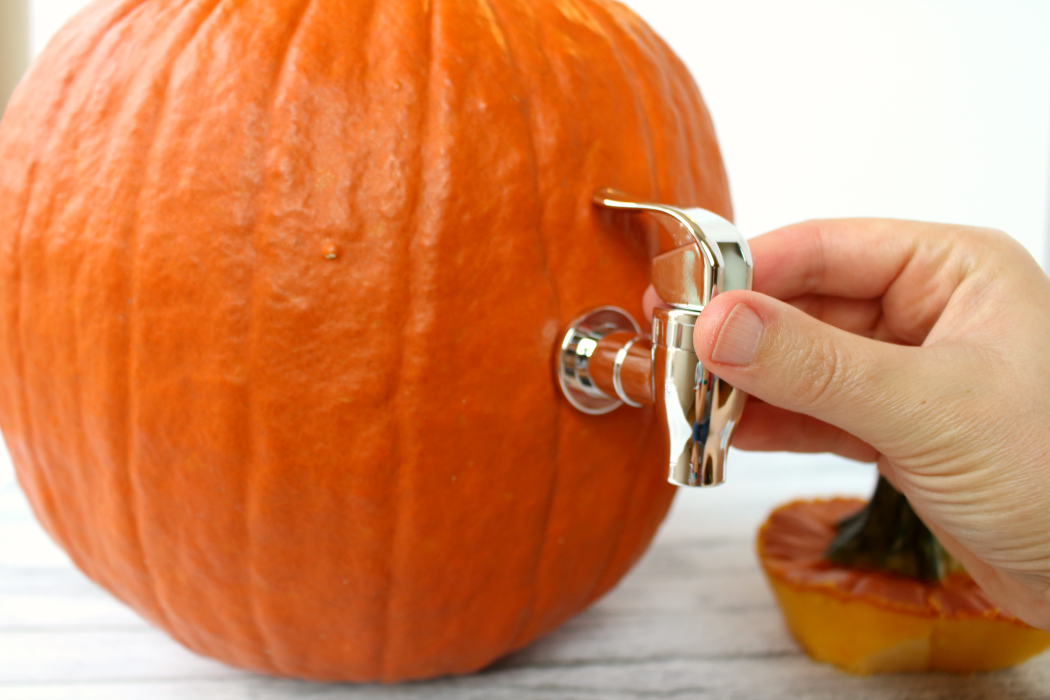
Carefully and firmly, insert the spigot making sure the plastic backing goes all the way through the pumpkin.
4 Add Your Beverage of Choice
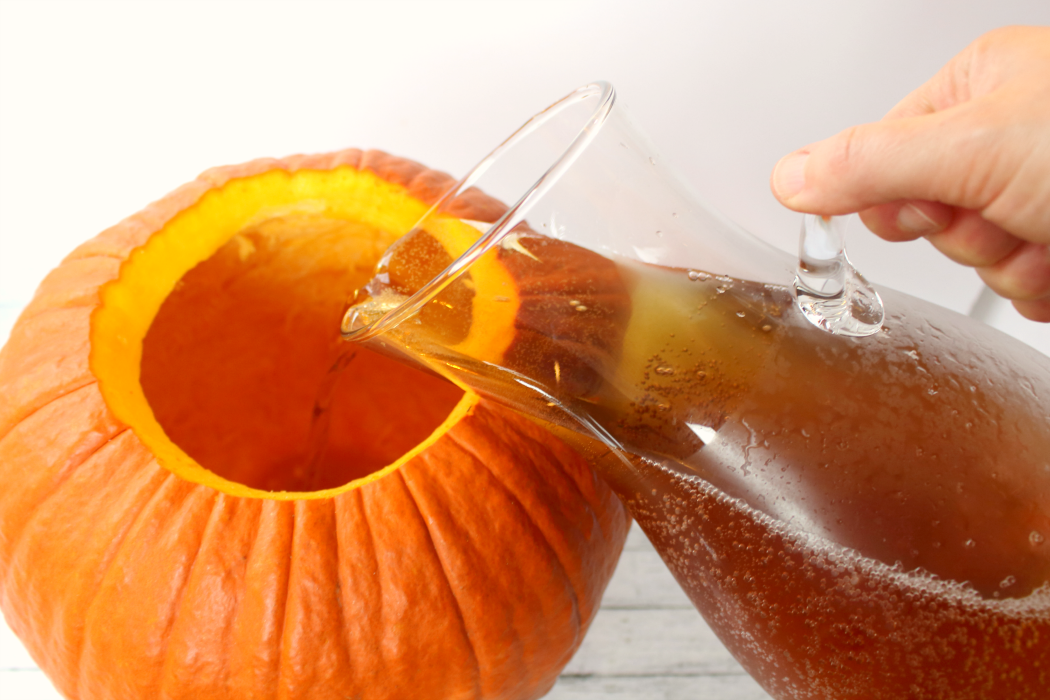
Now that your spigot is inserted into the side of the pumpkin, your keg is ready take on the liquid. Pour in the Butterbeer or your favorite party beverage.
5 Pour the drinks and Enjoy!
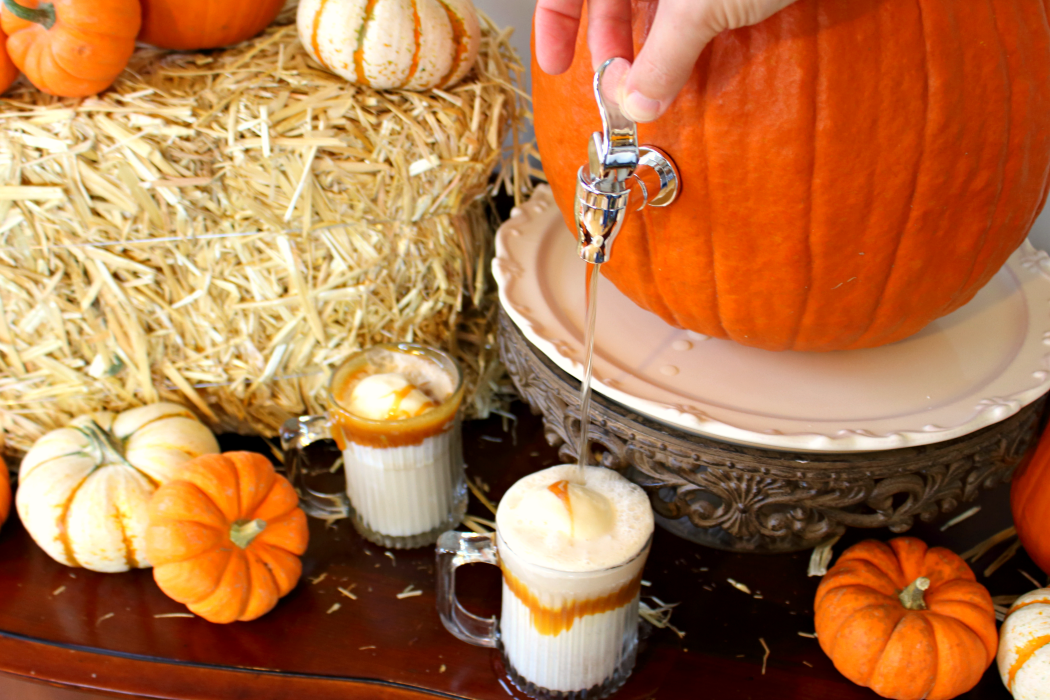
Your pumpkin keg is now the perfect drink dispenser for your Halloween party! Add to a pumpkin-themed buffet table to impress your guests and be sure to stock with plenty of cups. To refill, simply remove the top of the pumpkin and pour in additional drinks for your guests to enjoy.