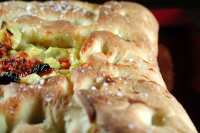
Artichoke, Tomato and Asiago Focaccia

"High moisture flat breads like focaccia can be temperamental when it comes to humidity. You may find you need to add more milk or flour to get the right consistency. The instructions are written with a beginner in mind; this recipe is not as intimidating as it looks. A quick note on measuring: I use sifted flour, and sift it right into the measuring cup. If you tend to scoop yours up out of the bag, start with less, as it may be more compacted."
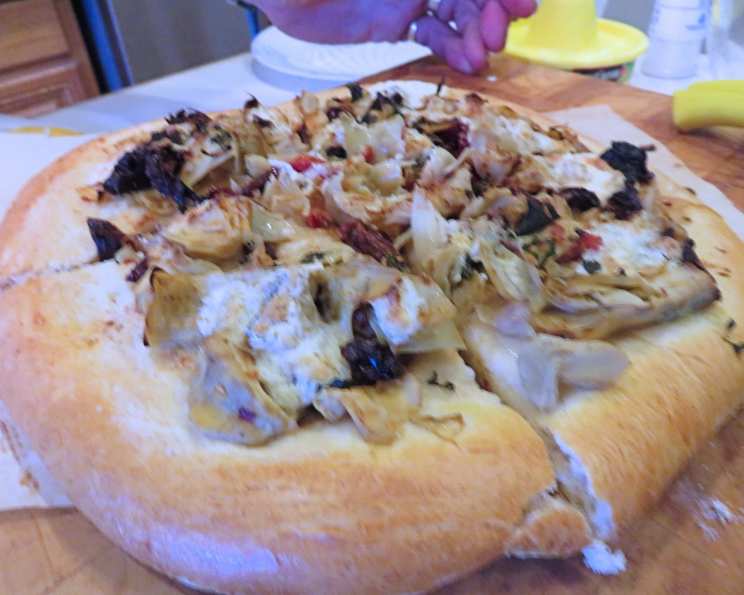
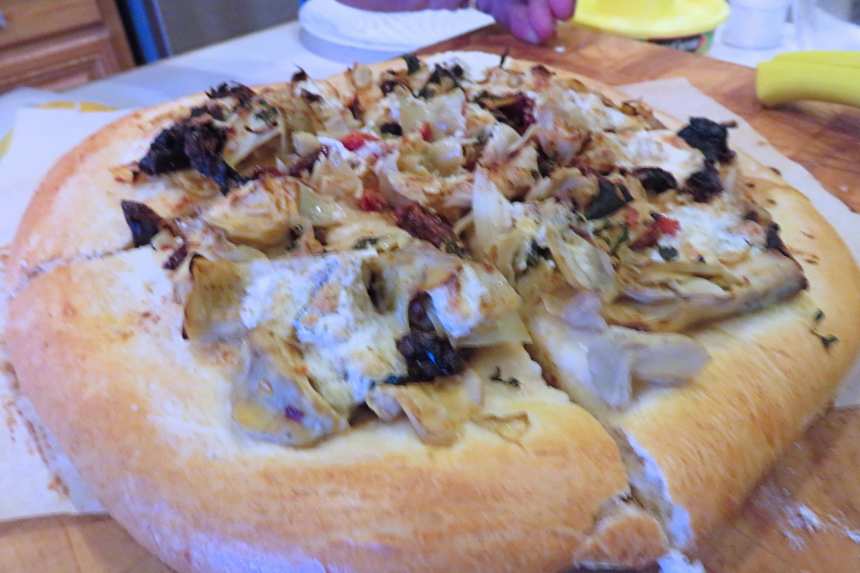
photo by Bonnie G #2


- Ready In:
- 4hrs 30mins
- Ingredients:
- 10
- Serves:
-
6-8
ingredients
- 2 1⁄4 cups all-purpose flour
- 1 cup milk
- 1⁄2 teaspoon fast rising yeast
- 1 tablespoon olive oil
- 1 teaspoon salt
- 1⁄2 cup canned or jarred artichoke heart
- 1⁄4 cup sun-dried tomato, chopped
- 1⁄4 cup grated asiago cheese
- 1 tablespoon olive oil
- 1 teaspoon kosher salt
directions
- Scald the milk, and cool to lukewarm, not too hot, or it will kill the yeast (about 100F).
- Mix flour, yeast, oil and milk in a medium bowl, cover and let rest for 20 minutes.
- Sprinkle on salt and mix dough in an electric mixer with dough hook on low medium speed, adding flour as needed until it is sticky and stretchy, and comes away from the sides of the bowl. (You can knead by hand, it will just take longer.).
- Let dough rest, covered, 30 minutes, knead again for about 5 minutes. The dough should be very sticky, but hold together in a ball.
- Rinse and drain artichoke hearts, and finely chop.
- Mix artichokes, tomatoes, and cheese, set aside.
- The tomatoes will absorb any excess moisture from artichokes and soften nicely.
- Let the dough rise until doubled, about 1 1/2 to 2 hours.
- Scrape out onto a floured countertop or large cutting board.
- Shape the dough into a rough rectangle.
- Roll with a floured rolling pin to about 1/4 to 1/2 inch thick.
- Top roughly 2/3 of the dough with cheese, tomatoes, and artichokes, the mixture should be damp, but not dripping wet.
- Fold dough into thirds, like an envelope, with the empty third over the center, and the other side over that, and roll again gently, until the fillings just begin to be visible through the top of the dough.
- Place dough on a cookie sheet lined with parchment paper or silpat.
- Preheat oven to 450F; let dough rise, loosely covered, 1 to 1 1/2 hours, until puffy and soft.
- Brush dough with olive oil. Use fingers to make several small dimples in bread.
- Sprinkle with kosher salt, and more cheese if you like.
- Bake for 15 minutes, rotating pan after 10 minutes.
- Let cool slightly before cutting into squares.
Questions & Replies

Got a question?
Share it with the community!
Reviews
-
 Great bread, I used the dough setting on my bread machine to mix and then shape and cooked. Brushed edges with egg for shine, couldn't find the right cheese so used fresh mozzarella and served with a balsamic dipping sauce. Amazing flavor combo
 -
 5 Star - This may taken a long time to prepare but the end result was fabulous. I made this on a very hot and humid day and baked it at night for lunch the next day. The instructions were great! I was getting a little worried that my dough was not sticky and stretchy and was tempted to add a little more milk but I didn't and it all worked out fine. The bread itself was soft on the inside yet chewy on the outside like good Focaccia should be. The only criticism I have and I think it's personal taste, is that I wish it had more filling on the inside. Other than this I would be happy to pass this recipe to any bread lover. Thank you RSC #11 Chef
 -
5 stars. What a great combination of ingredients to make a unique almost stuffed focaccia. With such a small amount of yeast, the texture was still quite light. Reviewed for RSC #11.
-
 5 stars! This bread takes a bit longer to make, but it's worth it. It has excellent flavor and smells wonderful when baking! I subbed in a bit of whole wheat flour for the all purpose and didn't sprinkle the top with salt. I sprayed the top of the bread with cooking spray and sprinkled it with more asiago instead. Made and reviewed for RSC#11. Good Luck!
 -
 This focaccia was tasty. I liked the mixture of ingredients in the filling. However, I had some trouble with the directions. There was too much flour, which I wasn't expecting. I had to start over entirely and ended up using about 1/4-1/2 cup less than the recipe called for. I also coated the pan with olive oil before letting it rise. This made it a little more manageable. The finished product had a great texture, though I think that some rosemary or oregano would have been a great addition to the dough. Good luck in the contest!
see 1 more reviews
Tweaks
-
5 stars! This bread takes a bit longer to make, but it's worth it. It has excellent flavor and smells wonderful when baking! I subbed in a bit of whole wheat flour for the all purpose and didn't sprinkle the top with salt. I sprayed the top of the bread with cooking spray and sprinkled it with more asiago instead. Made and reviewed for RSC#11. Good Luck!
RECIPE SUBMITTED BY

I work in the lab of a large county hospital. Cooking, particularly exotic ethnic cuisines and fancy desserts is my therapy and stress relief. Being a geeky kind of person, I'm really into the science of food.
I'm getting into playing cooking games and contests on 'Zaar. Why not come play with us? It's lots of fun.
<img src="http://i23.photobucket.com/albums/b399/susied214/projects/200_PACpic.jpg">
<img src="http://i27.photobucket.com/albums/c175/emmyduckie/teambanner1.gif">
<img src="http://i3.photobucket.com/albums/y53/DUCHESS13/RSC%20Banners/RSC11-Participant.jpg">
<img src="http://i27.photobucket.com/albums/c175/emmyduckie/babes_banner.gif">
<img src="http://i3.photobucket.com/albums/y53/DUCHESS13/RSC%20Banners/RSCParticipationBanner.jpg">
<img src="http://i23.photobucket.com/albums/b399/susied214/permanent%20collection/PACfall08partic.jpg" border="0" alt="Photobucket">
<img src="http://i23.photobucket.com/albums/b399/susied214/permanent%20collection/IWasAdoptedfall08.jpg" border="0" alt="Photobucket">
<img src="http://i250.photobucket.com/albums/gg271/MrsTeny/ParticipationBanner.jpg"border="0" alt="Photobucket">
<img src="http://i23.photobucket.com/albums/b399/susied214/Dollar%20Contest/DiningonaDollarParticipant.jpg" border="0" alt="Photobucket">
<img src="http://i250.photobucket.com/albums/gg271/MrsTeny/Permanent%20Collection/PACSpring09Iwasadopted.jpg"> <img src="http://i250.photobucket.com/albums/gg271/MrsTeny/Permanent%20Collection/PACSpring09Participation.jpg">
<img src="http://i27.photobucket.com/albums/c175/emmyduckie/banner2009.jpg" border="0" alt="Photobucket"width=100%>
<img src="http://i23.photobucket.com/albums/b399/susied214/permanent%20collection/participantbannerzwt5.jpg" border="0" alt="Photobucket">
<img src="http://i23.photobucket.com/albums/b399/susied214/craze-e2banner.jpg" border="0" alt="Photobucket">
<img src="http://i23.photobucket.com/albums/b399/susied214/calendar%20clips/3Craze-E.jpg" border="0" alt="Photobucket">