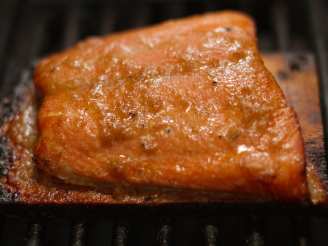
Cedar plank salmon

"This recipe's roots are with Pacific coast indian tribes who would cook and smoke their fish and seafood tied to wooden boards and placed near an open fire. This version is done on your barbecue and produces results that will have you running to the lumberyard and fish market regularly"
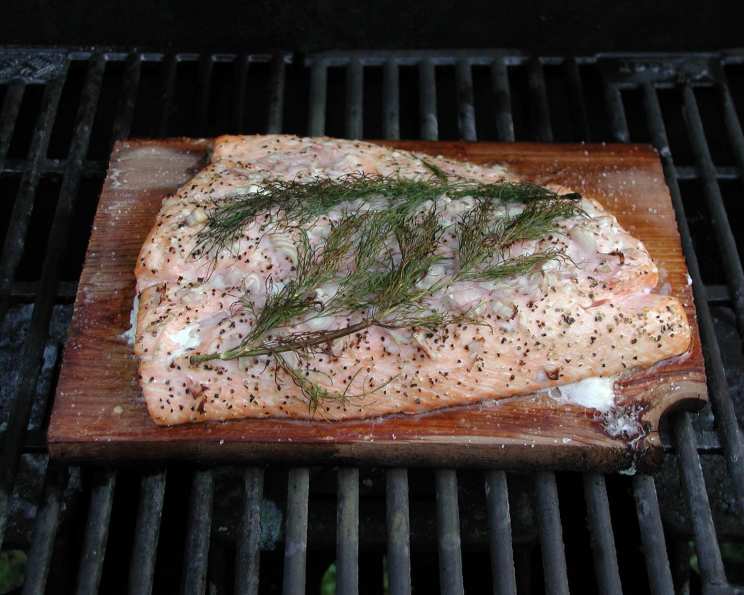
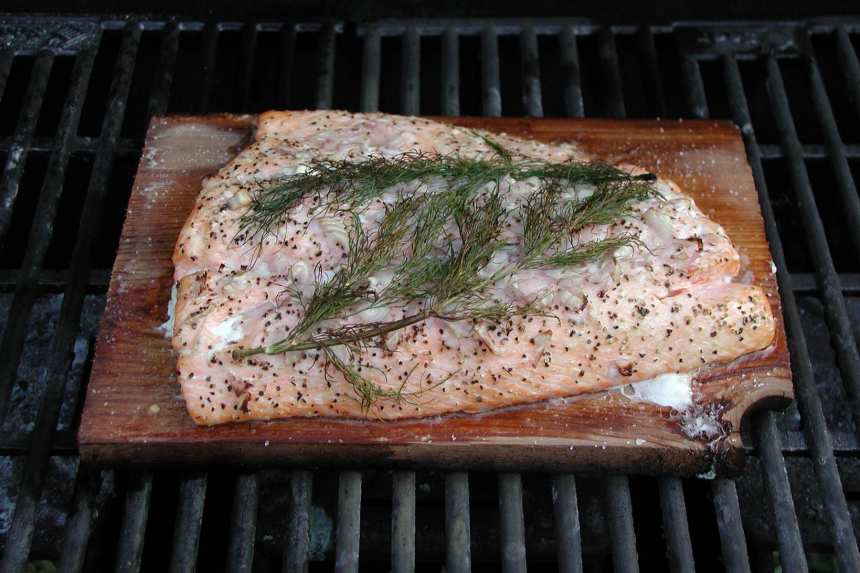
photo by Chefton


- Ready In:
- 20mins
- Ingredients:
- 8
- Serves:
-
4
ingredients
- 4 (6 ounce) fresh atlantic salmon fillets, about 1 inch thick,skin removed
- 4 tablespoons roast garlic infused olive oil
- 4 tablespoons finely chopped shallots or 4 tablespoons red onions
- fresh dill
- 1 lemon, cut in half
- coarsely crushed black peppercorns
- coarsely crushed pink peppercorns
- coarse salt
directions
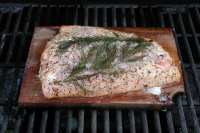
- Soak a 10 inch long, 6" to 8" wide, construction grade cedar plank 3/4" thick, in water for at least 24 hours before making the recipe.
- Make sure you keep the wood submerged by weighing it down with cans.
- Start your barbecue and heat it to high.
- Rub the salmon filets all over with the oil, sprinkle each one with some of the shallots, top with a few sprigs of fresh dill and a squirt of lemon juice.
- Finish with the crushed peppercorns.
- Put the plank on the BBQ and sprinkle with a little coarse salt.
- Close the cover for a couple of minutes or just until the top of the plank is nearly dry.
- Note: Keep a spray bottle of water close at hand in case the wood starts to burn.
- Place the filets on top of the plank.
- If your BBQ has two burners, turn off the one beneath the wood.
- If not, turn the heat to the lowest setting.
- Close the cover and cook for about 10- 12 minutes or until nearly cooked all the way through.
- Don't overcook.
- Squeeze some lemon juice over the top, serve and enjoy.
- The plank can only be used once.
- Make sure it has stopped smoking and is well extinguished before disposing of it.
Questions & Replies

Got a question?
Share it with the community!
Reviews
-
 Delicious! I made this for a lady friend of mine as a nice romantic dinner. I was a little nervous having never plank grilled before. But the instructions made it easy and the recipe is phenomenal! Try it!!!
 -
 Wow! I practically live in the kitchen, but I'm fairly new to grilling. I followed this recipe exactly as written and the results were FAR better than I expected!! I think these directions are pretty fool-proof! I can't think of any reason to cook salmon any other way. This was so delicious.
 -
 I made a simplified version of this tonight. This is a real winner. http://thesimpletable.com/archives/51
 -
 I do have to admit that I was intimidated by the concept of plank grilling at first, but intrigued enough to give it a shot, and wow, did this one pay out! This is the BEST salmon I've had. So good that we made it two nights later for my in-laws, who also raved. We didn't have the peppercorns, so we modified seasonings a bit, but the strength of the recipe is in the way it's cooked. LOVE IT. Also, Rockyp, I liked the mini history lesson, too! It's so neat that you put the "roots" of the recipe on here.
 -
 Oh, THANK YOU for the fantasticly specific instructions. As DH and I put it: "It would be hard to have salmon any other way now!". The taste of the cedar radiated throughout the fish. I served it with roasted red potatoes and asparagus. Wonderful.
see 5 more reviews