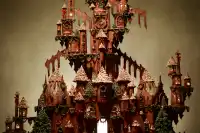
Gingerbread Castle

"A magical addition to any winter spread."
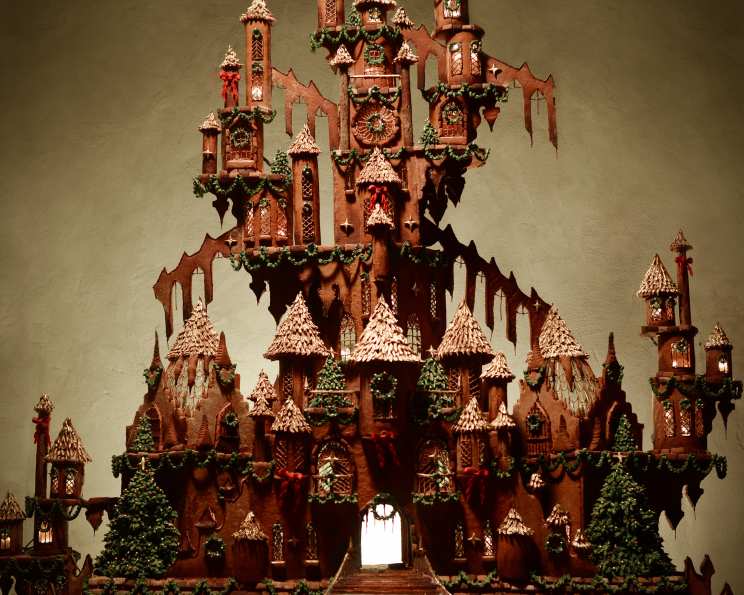
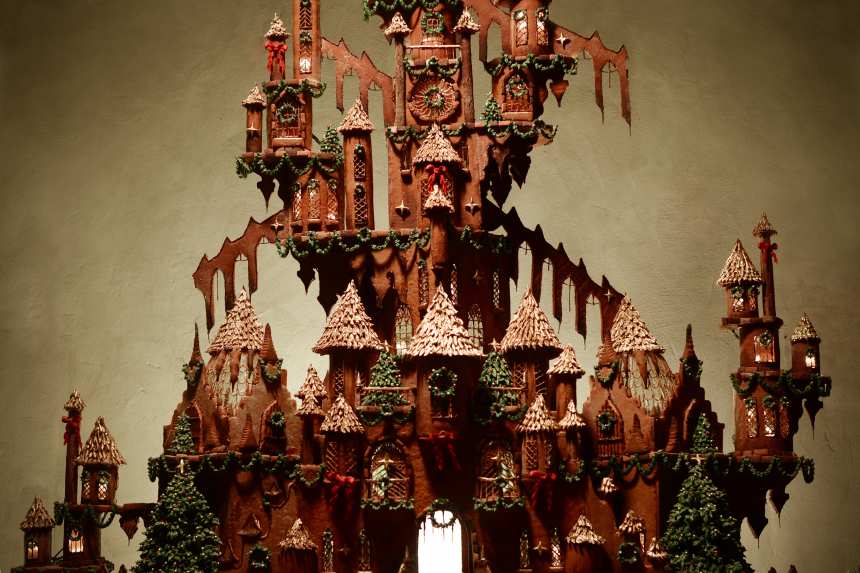
photo by ChristineMcConnell


- Ready In:
- 270hrs
- Ingredients:
- 32
- Serves:
-
50
ingredients
-
GINGERBREAD
- 1 1⁄2 cups unsalted butter
- 1 1⁄2 cups brown sugar, packed
- 1 normal jar molasses
- 2 teaspoons salt
- 4 teaspoons cinnamon
- 4 teaspoons ground ginger
- 1⁄2 teaspoon allspice or 1/2 teaspoon clove
- 2 large eggs
- 7 cups all-purpose flour
-
CANDY GLASS
- 2 cups water
- 3 1⁄2 cups granulated sugar
- 1 cup light corn syrup
- 1⁄4 teaspoon cream of tartar
- blue food coloring
-
ROYAL ICING for GINGERBREAD CASTLE
- 3 1⁄2 cups confectioners' sugar
- 3 large egg whites
- 1⁄2 cup cocoa powder
- 1 teaspoon cinnamon
- 1⁄2 teaspoon nutmeg
- red food coloring (amount varies depending on desired shade)
- yellow food coloring (amount varies depending on desired shade)
- 1 drop black food coloring
- royal icing, for holly
- 4 cups confectioners' sugar
- 3 large egg whites
- 1 teaspoon vanilla
- green food coloring (amount varies)
- red food coloring (amount varies)
-
ADDITIONAL TOOLS
- parchment paper
- cardboard cutout stencils lightly dusted with flour
- multiple large baking sheet lightly dusted with flour
- painted wood board for displaying gingerbread
directions
-
GINGERBREAD CASTLE:
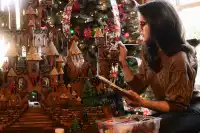
- **For my gingerbread structures, I like to build their general shape out of cardboard first. This is a great way to address any structural issues before it's too late. They also give you an amazing stencil to use to cut out your cookie shapes and then later they're great for preventing any mess when you're pouring candy glass windows into your finished cookies.
- In a stand mixer beat butter and sugar until creamy, add molasses and eggs. In another bowl, mix all dry ingredients. Once done slowly mix into wet ingredients and stir until dough ball forms. Wrap softball sized portions in foil and chill until ready to use.
- Heat oven to 360 degrees fahrenheit.
- Line cookie sheets with parchment and roll dough directly onto cookie sheets. Using flour to prevent sticking. Cut out shapes using homemade stencils and save scraps for the next sheet.
- Baking time varies depending on how large your cookie is. Large cookies can take 18 minutes and small decorative pieces can be done in as little as 5 minutes. So keep an eye on them. Once baked, remove from oven (and here's my secret to getting a smooth cookie -- immediately after removing a batch from the oven, place a sheet of parchment over the top and using a slightly smaller baking sheet press, slide and swivel the smaller sheet on top until perfect. Allow cookies to cool before removing and place on paper towels. Do any candy glass windows BEFORE assembling.
- Advice and pointers: Assembling is my personal favorite part, but be sure to have a lot of patience and go slowly. Don't let go of any pieces unless you're positive they're secure and if you're unsure, use various kitchen items as supports -- things get pretty jenky in my kitchen during this process. Know that cookies will break here and there, make extra of critical pieces if you have the time and keep in mind you're doing something fun and when things go wrong, it's just a lesson for the future -- at least that's what I tell myself when I'm facing a kitchen catastrophe :D.
-
CANDY GLASS:
- Mix sugar, water, corn syrup and tartar in a large pot on medium/high heat. Stir constantly until mixture begins to boil. Stop stirring and place candy thermometer on the edge of the pot with the temp gauge submerged into sugar syrup. This part takes FOREVER (20 or so minutes) so set up a chair next to the stove and grab a magazine/book/laptop and keep an eye on the thermometer. Allow to heat to 300 degrees and immediately remove from heat. Stir and mix in two drops blue food coloring. Have cookies clean and resting face up on a very flat surface covered in a aluminum foil. Use your cardboard stencil over your cookie and pour candy glass into your cutouts using a bent tea spoon or small ladle. Once poured, immediately lift stencil off and clear any sugar strands that occur.
- Advice and pointers: This is one of those things you should set a lot of time aside for and prepare yourself with a lot of patience. Having a plate warmer to set the pot of hot sugar on near your workstation is a great way to give yourself a bit more time to work with each batch. Depending on how many windows you have to do, you'll be needing to make several batches. As soon as one batch begins to harden, you need to cut your losses and discard it (I've learned this the hard way). This stuff is also INSANELY hot so be very careful and make sure no pets, children or other obstacles are around when working with candy glass!
-
ROYAL ICING for GINGERBREAD CASTLE:
- ( I made this batch probably 6 times throughout the project).
- In a stand mixer beat egg whites till frothy and incorporate sugar until smooth. Then mix in the rest of the ingredients little bits at a time until the color you desire is achieved.
- Advice and pointers: Because you're using raw egg whites and salmonella is a risk, always use fresh eggs from a reliable source and don't allow unused frosting to sit out for more than an hour or so. Any unused frosting can be covered with a damp towel to prevent drying and retain freshness. Keep in mind the longer you work with a single batch the darker the color will become, so when initially mixing, keep that in mind.
-
ROYAL ICING FOR HOLLY, WREATHS AND CHRISTMAS TREES:
- Using any used gingerbread dough, cut out and shape christmas trees and bake. Using a small star tip (I actually bent mine with a small hammer to get the perfect shape) pipe royal icing all over giver bread and decorate with sugar beads which you'll then need to tediously paint.
Questions & Replies

-
 do you have any templates for this castle?
 -
 I've made all of my cut outs from cardboard but I'm unsure how to get my curved pieces to hold their shape when baking. In the progress pictures, it looks like the gingerbread is laying on top of cardboard molds?? isn't it dangerous to put cardboard in the oven? What material did you use exactly to bake the curved pieces? If I put my gingerbread in the freezer to hold their shape and then take them off the molds to bake would they hold their shape mostly?
 -
what is "one normal jar of molasses". Ridiculous recipe, no real measurments. Wish I didn't use this.
-
This is fantastic! I have two questions from the "in progress" pictures. First, do you cook the gingerbread on the curved molds (that it looks like are made of cardboard and kept curved by tape)? Second, what are you using as "paint" for the trees?
-
 What do you use to assemble the gingerbread house? I have heard people using royal icing or melted sugar concoction to glue pieces together....
Reviews
-
 This is magnificent! In days gone by I used to win awards for my gingerbread creations. There's a much easier way to make the glass windows though. Simply purchase lollipops in the colour/s you are looking for and grind them in a coffee grinder. Then spoon a thin layer onto a lightly greased foil lined baking sheet, slightly overlapping the outlines that you have drawn. Bake in an oven just until they melt. Cool, remove and "glue" to the back of the gingerbread structure with royal icing. Makes fabulous stained glass windows as well if you use multiple colours.
 -
You are a recent discovery! Thank you for sharing how you design your wonderful creations. Every detail is inspiring!
RECIPE SUBMITTED BY

ChristineMcConnell
United States
Artist, photographer, baker and author of Deceptive Desserts


