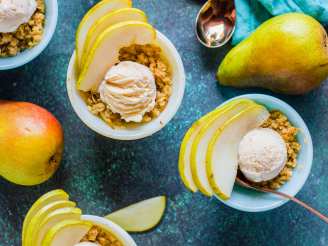
Pear Crisp

"A terrific way to use up the best winter fruit that we have going for us! This classic crisp has no bottom crust to get soggy. No thickener is necessary since the juices are concentrated during baking. The crisp is at its best when served warm, accompanied by caramel or vanilla ice cream. From Rose Levy Beranbaum"


- Ready In:
- 50mins
- Ingredients:
- 12
- Yields:
-
1 crisp
- Serves:
- 6
ingredients
-
For the pears
- 2 1⁄4 lbs bartlett pears or 2 1/4 lbs bosc pears, peeled,cored and sliced 1/2 inch thick (about 6 large pears)
- 1 tablespoon freshly squeezed lemon juice
- 4 1⁄2 tablespoons granulated sugar
- 1⁄8 teaspoon salt
- 1 1⁄2 tablespoons unsalted butter
-
For the topping
- 4 teaspoons firmly packed light brown sugar
- 1⁄4 cup walnuts (about 1 ounce)
- 1 pinch salt
- 1⁄2 teaspoon ground cinnamon
- 1⁄4 cup all-purpose flour
- 2 tablespoons unsalted butter, melted and cooled
- 1⁄2 teaspoon vanilla extract
directions
- Adjust the oven rack to the position 1 up from the bottom position.
- Preheat the oven to 400 degrees.
- Have ready a 9-inch square baking dish or a 6-cup casserole dish.
- If using a glass dish, reduce the temperature to 375 degrees.
- For the pears: In a large bowl, gently toss the pears with the lemon juice, granulated sugar and salt to combine.
- Set aside, stirring occasionally, for 30 to 60 minutes.
- For the topping: If mixing in a food processor fitted with metal blades: Pulse together the brown sugar, walnuts, salt and cinnamon until the nuts are coarsely chopped.
- Add the flour, butter and vanilla and pulse until the mixture is coarse and crumbly, about 20 times.
- Transfer to a small bowl.
- Using your fingertips, lightly pinch together the mixture to form little clumps.
- Set aside.
- If mixing by hand: In a medium bowl, whisk together the brown sugar, walnuts, salt, cinnamon and flour.
- Using your fingertips, smash any lumps of sugar.
- Using a pastry blender or 2 knives held crisscross fashion, cut in the butter and vanilla until the mixture resembles coarse meal.
- Using your fingertips, lightly pinch together the mixture to form little clumps.
- Set aside.
- To assemble: Place a colander over a large bowl.
- Transfer the pear mixture to the colander and drain.
- Transfer the pears to the baking dish; set aside.
- Reserve the liquid.
- Pour the liquid (you should have at least 6 tablespoons) into a small saucepan and heat over medium-low heat.
- Add the reserved 1 1/2 tablespoons butter and cook, stirring occasionally, until the mixture reduces to 3 tablespoons, about 10 minutes.
- Pour the liquid over the pears in the baking dish.
- Cover the dish with aluminum foil, make a 1-inch slash in the middle of the foil and bake the pears for about 30 minutes, until a sharp knife meets with only a little resistance when inserted into a pear.
- Remove and discard the foil and sprinkle the pears evenly with the reserved topping.
- Bake, uncovered, for 15 to 20 minutes, until the topping is crisp and golden-brown, the fruit juices are bubbling and the pears are tender but not mushy when a small sharp knife is inserted.
- Transfer the baking dish to a wire rack to cool.
- Serve warm or room temperature.
- (May cover and refrigerate for up to 3 days.).
Questions & Replies

Got a question?
Share it with the community!
Reviews
-
 This was totally delicious and easy to make. For some reason, the pears did not give me as much liquid as I needed, so I added some wine (Gewurtztraminer), and the result was excellent.
 -
 My family and I truely loved this! I used my food processor for the topping and that seemed to work well. I especially liked the addition of nuts to the more traditional crumbly crisp topping.
 -
 Tasted good, but found the topping hard to make. I had to keep adding ingredients because I couldn't get it to come out the right texture. In the end, I'm not sure I got it quite right. The whole dessert was a bit too runny, and didn't reheat very well.
 -
Fantastic recipe! The walnuts really work well with the pears to create a great tasting dessert. It is very important to follow the recipe exactly as allowing the pears to sit drains a huge amount of fluid from them which is essential to get a good texture.
-
I'm not sure exactly where to start with my comments. First, I didn't find this recipe easy to make like one poster commented. I decided to follow the recipe exactly until it became too frustrating. The instructions would benefit from being rewritten. To begin with, Step 2 preheats the oven to 400 degrees. Step 6 says to set aside the pear mixture for 30-60 *minutes*. I don't know about anyone else, but my oven doesn't take that long to heat up. It was a waste of energy/heat and I still hadn't completed making the dish. Step 8 stated to add the butter and vanilla mixture, and so did Step 14. But then in Step 22 it said to add the *reserved* butter. There was no reference to reserved butter in the previous 21 steps. At this point with the oven wasting energy and no reserved butter, I decided I wasn't going to go through the extra steps of draining the pears in a colander and reducing the juice for another 10 minutes while the oven sat baking nothing. Instead, I added two tablespoons of flour to the pear mixture and added the topping immediately instead of as an additional step later on. It seemed the instructions were too poorly written for a recipe that looked very simple. The dish was OK tasting, like cooked sweet pears. If I did make this recipe again, I would double the topping amount because there wasn't enough for me. But I won't go through the trouble of making this recipe again. Taking all the time to prepare the pears, along with poor instructions, and not a very unique tasting dessert isn't worth my time. Two star rating because the pears weren't ruined.
RECIPE SUBMITTED BY

Steve_G
Fort Myers, Florida