Sweet Cream Tartlets from the Fearless Baker
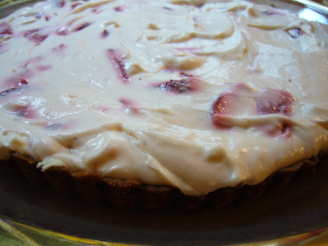
"Sweet Cream Tartlets excerpted from THE FEARLESS BAKER © 2017 by Erin McDowell. Reproduced by permission of Houghton Mifflin Harcourt. All rights reserved. ||| These tarts feature a press-in crust with a simple panna cotta–style filling, and they are finished with raspberry jam and chocolate. You can spread, pipe, or drizzle on the jam and chocolate, but I like to use a pastry brush or small spoon to make “splatter tarts” (see Pro Tip)."
%2520Jennifer%2520May.jpg)
%2520Jennifer%2520May.jpg)
photo by Food.com

- Ready In:
- 1hr 20mins
- Ingredients:
- 17
- Yields:
-
6 3 3/4-inch tarts
ingredients
- 1 recipe chocolate, Press-In Tart Dough (below), divided into 8 equal pieces (50 g or 3 1/2 tablespoons each)
- 2 ounces bittersweet chocolate, chopped, melted, and cooled slightly (I use 60% cacao)
-
FILLING
- 1⁄3 cup cool water
- 1 tablespoon gelatin powder
- 2 cups heavy cream
- 1⁄3 cup granulated sugar
- 1 teaspoon vanilla extract
-
TOPPING
- 1⁄3 cup seedless raspberry jam
- 2 ounces bittersweet chocolate, (I use 60% cacao), chopped, melted, and cooled slightly
-
PRESS-IN TART DOUGH
- 8 tablespoons unsalted butter, at room temperature
- 1⁄4 cup granulated sugar
- 1 large egg yolk
- 1 1⁄2 cups all-purpose flour
- 1⁄4 cup unsweetened cocoa powder
- 1⁄2 teaspoon fine sea salt
- 1 tablespoon water
-
EGG WASH
- 1 large egg, beaten with 1 tablespoon water and a small pinch of fine sea salt
directions
-
PRESS-IN TART DOUGH:
- Makes one 10-inch crust (or enough dough for 12 tartlets).
- DIFFICULTY: Easy.
- MAKE AHEAD AND STORAGE: The tightly wrapped dough can be refrigerated for up to 4 days; bring to room temperature before using. Wrapped in plastic wrap and then in aluminum foil, the dough can be frozen for up to 3 months. Thaw overnight in the refrigerator before using.
- In the bowl of a stand mixer fitted with the paddle attachment (or in a large bowl, using a hand mixer), cream the butter and sugar on medium-low speed until smooth, 2 to 3 minutes.
- Add the egg yolk and mix on medium speed to combine. Scrape the bowl well. Add the flour, cocoa powder and salt and mix on low speed until fully incorporated, 45 seconds to 1 minute. Add the water and mix just until the dough is smooth, 1 minute more.
- Turn out the dough and use your fingers to press it into a 10-inch tart pan (see Pro Tip). Once the sides and bottom of the pan are fully covered, smooth the dough with your fingers to even out any thicker spots. Use a paring knife held flush against the rim of the pan to trim the excess dough, leaving a clean edge. Prick the dough all over with a fork. Freeze for at least 30 minutes and up to overnight.
-
WHY IT WORKS:
- Creaming the butter and sugar for less time than you would for a cookie dough helps keep the crust from puffing up too much in the oven.
-
PRO TIP:
- When pressing the tart dough into the pan, I start at the edges and work my way inward. This helps make the sides even (the hardest part, I think!), preventing too much buildup in the corners.
-
DIRECTIONS FOR TARTLETS:
- Press each piece of dough into a 3¾-inch tartlet pan: Start with the sides and work your way to the middle, patting gently to even the dough to about ⅛ inch thick all over and letting the excess dough push up above the edges of the pan. Trim the dough by holding a paring knife flush against the edge of each pan and cutting away the excess smoothly, leaving a clean edge. Prick the dough all over with a fork. Freeze the crusts until firm, 15 to 20 minutes.
- Preheat the oven to 400°F / 204°C, preferably with a baking stone on the bottom rack.
- Transfer the tartlet pans to a baking sheet and bake on the stone or bottom rack until the crusts appear dry on the surface and the edges are firm, 15 to 18 minutes. If the dough puffs up noticeably during baking, prick it with a fork to deflate. When the tart shells are fully baked, you can also slam the tray down on the counter once or twice to help flatten the crusts.
- Cool the crusts completely, then invert the pans over a baking sheet and tap them gently to unmold the crusts onto the baking sheet; turn them right side up.
- Spoon a heaping tablespoon of melted chocolate into the base of each cooled shell and spread it into an even layer that coats the base. Set aside to allow the chocolate to set completely.
-
Make the filling:
- Pour the water into a shallow cup and sprinkle the gelatin evenly over it. Let soak for 5 minutes.
- In a small saucepan, heat 242 g / 1 cup of the heavy cream and the sugar over medium heat, stirring, until the cream is hot and the sugar is dissolved. Add the gelatin and stir until it is fully melted.
- Pour the hot cream mixture into a medium bowl. Stir in the remaining 242 g / 1 cup cream and the vanilla.
- Pour the custard into the cooled tart shells, filling them to just below the edges. Transfer the tarts to the refrigerator and chill until the custard is set, 20 to 30 minutes.
- 10.In a small heatproof bowl, micro-wave the jam until thinned and fluid, 30 to 45 seconds. Use a small spoon to drizzle the jam over the chilled tarts, then do the same with the cooled melted chocolate, or make “splatter tartlets”; see Pro Tip. Refrigerate the tarts until ready to serve.
-
WHY IT WORKS:
- Panna cotta (the name is Italian for “cooked cream”) is a delicious dessert all on its own, and it makes a killer filling for pies and tarts. Made with milk, cream, or a combo, the silky-smooth custard is set with gelatin. This method makes the sur-face set beautifully smooth—which makes the panna cotta the perfect base for pretty finishes.
-
PRO TIP:
- To splatter on the jam and chocolate, I use a silicone pastry brush with thick bristles. Line your work surface with parchment paper, then dip the pastry brush into the jam. Flick the brush over the tarts, and the jam will splatter randomly. Clean the brush, then do the same with the chocolate.
- Recipe courtesy of THE FEARLESS BAKER by Erin Jeanne McDowell.
-
Get the book here:
- https://www.amazon.com/Fearless-Baker-Simple-Secrets-Baking/dp/0544791436.
Questions & Replies

Got a question?
Share it with the community!
Reviews
Have any thoughts about this recipe?
Share it with the community!
RECIPE SUBMITTED BY
Food.com
United States
Hungry for good food AND great conversation? Food.com boasts a smorgasbord of over 500,000 recipes and a community-inspired activity feed that allows our users to add reviews, tweaks, questions and photos to their favorite recipes. Grab a plate and join the fun!
.jpg)